Tuesday, November 8, 2016

FASA STSCS Firing Arc House Rules

I've decided to post a house rule change to the FASA rules that I originally came up with in my vest wearing, teen long hair early 90's wargaming days.  The FASA Star Trek Starship Combat System rules were designed in the wild west of game design 1980's and they definitely show it.  For instance, the game is based on hex grid combat so you'd expect that the firing arcs of wtrieapons as well as the defensive shield arcs to be based on that hex grid.  What you may not expect nowadays is that they were completely different in a needlessly complicated THAC0 sort of way instead of sharing the same arcs.  Shield arcs were strictly based on the grid and what shield you were actually hitting.  Weapons, however, were not.  Your forward shield arc was not the same as your forward weapons arc.  I've shown both in the picture below with the firing arcs on the left and shield diagram on the right.


On top of that, the arcs themselves were wildly out of scale with each other with the side arcs being much bigger than the front and back.  Now I can see some semblance of adherence to starship design there (the side arc isn't blocked by anything like engines unlike the other arcs) but it doesn't make for a very fair distribution.  On top of that, the rudimentary ship construction rules allowed you to assign multiple arcs to a weapon for no additional cost despite the additive effect.  A weapon that only fired in your front arc costs the same as an identical weapon that fires anywhere in your forward, port, and starboard arcs combined (so basically only excluding the straight line right behind your ships).

In one of my first house rules ever that I came up with (this was my first wargame after all!), I decided that the arcs needed to be as equal as possible and to follow the shield arcs at least partially.  I evened out each firing arc to three shield arcs each.  For instance, the forward arc would now encompass shields 1/2/3 on the diagram.  The forward/port (F/P) arc would instead be 6/1/2.  Port is made up of the full 1/6 shield arcs and the corresponding port halves of the 2/5 arcs.  They pretty much all equal out to 180 degrees roughly now and mostly correspond to three shield arcs.  The only outlier in this system is the rare ship that uses F/P/S which only excludes one straight line on the entire hex grid; those ships would instead have their WDF increased by a flat 10% overall to account for the almost full 360 degree firing arcs.   Thanks to Christian Wimmer for making the original version of this images up for me in order to help explain the new arcs!


As always, thanks for reading and questions/comments/criticisms are welcome on the above optional house rule changes.  With the game pretty much dead for almost 25 years, the house rules above are obviously not endorsed in any way by anyone other than myself and are completely unofficial.  :)

Friday, November 4, 2016

Star Trek Wasp Class Destroyer for FASA STSCS

Another of Bill Krause's physical models ported over to the old FASA game system!  Bill did not actually design this vessel originally but rather adapted it from the original Hornet Class fighter carrier designed by Lawrence Miller years earlier.


Since I'm using Bill's tweaked design (and art with his permission) instead of the original Hornet version, I've decided to name it the Wasp Class after his own physical ship model.


Originally, the Hornet class was an approximately 147,000 ton (Class X in FASA game terms) carrier with externally attached fighters.  Unfortunately, carriers and fighters don't really exist in the old FASA starship combat rules and I've been trying to stay true to the core rules and design mechanics whenever possible.  Additionally, as a Class X vessel, it felt too similar in feel to either the Class IX Sentinel if conservatively statted out or especially the Class XI Shangri-la if aggressively statted out.  Instead, I've decided to make it a much lighter destroyer class instead for my FASA houserule stats while still paying homage to its original "carrier" role in the stats and especially the backstory.  So, without further blathering on, here is my take on the Wasp Class VIII Destroyer.  To get the full sized picture suitable for printing, right click and open the image in a new window.

In making this destroyer, I was trying carefully not to supercede the next size/power class up, namely the light cruiser.  The most modern official FASA light cruiser, the Andor class, is still markedly more powerful than the Mk I version of this destroyer which was its contemporary but on par with the upgraded Mk II of several years later.  Initially that bothered me but then I took a closer look at the Andor class itself and saw that it only ever had a single variant.  It was certainly in need of an upgrade after 5+ years of service and I came up with my own stats for a Mk II modernized Class IX Andor that is still noticeably less powerful than the heavier Enterprise Class XI cruisers and Chandley/Northhampton Class X-XI frigates but also noticeably more powerful than this smaller Class VIII destroyer.  Once I'm done with new ships, I may post my upgraded Andor Class light cruiser as well.

Monday, October 24, 2016

Shangri-la Class Fast Attack Cruiser for FASA STSTCS

To follow up on my earlier Star Trek original series designs, here is a more modern take from the movie era.   Again, thanks to Bill Krause for letting me use his images and stat up his design that started as a physical model which was entered and won the Wonderfest 2015 starship modelling competition.


At first, I had the ship as a class X fast attack cruiser with a heavy torpedo loadout (4x FP-5) as well as lots of long range light phaser banks (10x FH-3) which gave it a sizeable punch but kept it at the lighter class X range unlike other big gun ships (specifically the Enterprise and Chandley classes).  After talking with Bill, he specifically said that it had more firepower than the Enterprise so I buffed it up to class XI with an upgrade to heavy phaser banks as well.  The Ranger Mk II isn't meant to be a replacement for the Mk I but rather a "sidegrade" instead with slightly more firepower but less durability.  While working on this ship, I realized that the excel spreadsheet I use had a previously unknown error for the FH-10 phaser WDF stat that I also used on my previous Sentinel refit.  I corrected the stats and cleaned up the sheet a little for the previous update as well.  As always, I hope you guys and gals enjoy this and let me know if there are any mistakes other than minor tonnage discrepancies that I might have missed.  To get the full sized picture suitable for printing, right click and open the image in a new window.


Tuesday, September 20, 2016

Star Trek Sentinel Class Refit (FASA)

      When I posted my first FASA stat sheet, I was asked on another site whether or not there would be a refit variant.  At the time, my answer was no since the designer, Bill Krause, didn't make one up.  Over time, the idea grew on me and I decided to ask him if I could tweak his images to include a refit version of the Sentinel class with a bit more TMP design aesthetics.  He graciously allowed me to do so and even gave me a few pointers when working on the design.  I'm not an artist so this is mainly just a tweak of his existing design mixed with bits from his Shangri-la class.  In any case, here is the modified (yet again!) Sentinel Class cruiser for the FASA Star Trek Starship Combat game updated in the original post.


For anyone wondering just how big this fast attack/light cruiser is compared with the much more familiar U.S.S. Enterprise variants of the same era, here is a size comparison using the original FASA art that I'm trying to emulate.

Tuesday, September 13, 2016

Star Trek Hood Class Battlecruiser (Old Article)

BLOGGER'S NOTE:  I've since revised the Hood FASA stat sheet and posted a new blog article linked below in honor of the launch of Bill's model.  I've decided to keep this entry up just for historical reference.


Well, much to my surprise I'm still on a Star Trek kick at the moment and still working on some FASA Star Trek combat ship stats.  Once I've done a few more, I'll probably add a tab to the right to better organize the articles like I did for my Robotech and Heavy Gear houserules.  This Hood battlecruiser ship design is once again thanks to the talented Bill Krause who came with the Sentinel that hooked me months ago forcing me to make FASA stat sheets for the first time in 20 years.


This one is a warship unlike the previous light cruiser and meant to kick Klingon and Romulan butts while taking their names.  My goal was to make something based on yet significantly more powerful than the TOS era queen of battle, the Constitution Mk IV, while still markedly inferior to the more modern upcoming Enterprise class... a "missing link" between the two in terms of power as well as components.  Additionally, I wanted to incorporate features of the newer frigates like a troop contingent to better reflect its unique status as a "battlecruiser" in Starfleet predating the troop carrying frigates like the Chandley.  To get the full sized picture suitable for printing, right click and open the image in a new window.


Note:  Please note that I've cleaned up the format and minimally tweaked for balance the above sheet since its initial publication.  Furthermore, Bill is now working on the physical U.S.S. Hood model and making design changes from the initial concept that the stats are based off of; as such, it may undergo additional design changes to follow suit.

Thursday, August 11, 2016

FASA Star Trek Bonaventure Class Cruiser Sheet

I'm still on a bit of a Star Trek high at the moment (despite a tempered reaction to Star Trek Beyond) so I decided to work on another set of ship fan rules.  First off, thanks to Mia_36 on the Wolfs Shipyard Forum for graciously allowing me the use of her art for this stat sheet.  She's got multiple versions of the ship from an NX era looking variant to a TOS to a refit design!


The Bonaventure class was introduced in the Ships of the Line Calendar as a single image (not even detailed underneath by the artist since it wouldn't be shown!) and the look definitely intrigued me.  It reminds me of a 1950's style jet fighter ala the F-86 Sabre with the hull incorporated down the midline of the saucer section making it an appropriate predecessor to the 1960's Constitution Class aesthetics.  I took some liberties in the fluff for this ship as there frankly is almost nothing official beyond that it was on the drawing boards during the Enterprise novel era (post Romulan War).  I also decided to go for a more FASA style black and white bold outline image effect as well.  So as not to keep any FASA old fogies like myself waiting (or potentially any Star Fleet Battles old Foleys either!), here is my fan take on the Bonaventure in the FASAverse.  :)  To get the full sized picture suitable for printing, right click and open the image in a new window.


Tuesday, August 2, 2016

U.S.S. Sentinel for the FASA Star Trek Combat game

Just another quick update.  I saw Star Trek Beyond this past weekend and the run up to the movie has resparked some gaming interest in the universe as well.  I busted out my Star Trek FASA game rules and books to crunch some stats and was researching the various utilities for the game online.  In that search, I came across a master model builder and talented artist named Bill Krause who came up with both schematic images as well as a incredible custom physical model ship build for his U.S.S. Sentinel design and was hooked!


I've always been more of a Next Gen person but since diving back into Star Trek earlier this year I've found myself more drawn to the earlier series (both chronologically like TOS as well as in universe like ENT).   Bill's Sentinel design (along with the much smaller Archer class scout pictured docking with it in a WIP album pic) take those classic asthetics and bring them a bit further into the modern era without losing that retro charm.  I asked Bill if I could use his image for a FASA ship workup and he graciously agreed.  One of the resources I found online was the excellent fasaststcs website which also had some jpg templates for use with the classic FASA game, one of which I used as the background for the sheet below.

Using the above, I created the below background and stats for use with the classic FASA game.   To get the full sized picture suitable for printing, right click and open the image in a new window.  Enjoy!


Note: The sheet above was updated after initial publication to include the refit design variant as well as incorporate extra information from the Starfleet Dynamics deck plans.


Sunday, July 17, 2016

Star Trek NXL Long Range Exploration Pod

For a change of pace, I figured I'd post something that I came up with earlier this year while rewatching several of the Star Trek series on Netflix, most notably Enterprise.  First off, thanks to the talented Doug Drexler for designing both the original NX class ships for the TV show as well as the image of the NX refit that I used as the basis for my own conversion.


As the creator of the ship design, Doug Drexler, said in an episode of the Trekyards show, the prototype NX warp 5 ship had numerous variants and upgrades in development before launch.  During the first years after the initial launch of the NX-01 Enterprise, the galactic neighborhood proved to be far more dangerous than Earth ever thought and the various tactical and defensive upgrades were prioritized over more exploratory and scientific ones.  After the looming threat of the Xindi weapon was over, the focus shifted back to a more even handed approach regarding future upgrades.

One of the first primarily non-tactical upgrades deployed was the NXL long range exploration module.  While the later refit of the NX design was more promising, it was also fraught with delays and developmental hurdles as is common with more innovative designs.  The NXL module, combined with the earlier fast tracked tactical upgrades like photonic torpedoes and phase cannons, extended the capabilities significantly across all mission types over what was possible with the original design despite being a purposeful stop gap measure.

Unlike the refit, the NXL module did not replace the main engineering components.  Instead, it was primarily geared towards extending the mission duration between resupplies as well as acting as an emergency life boat for the crew.  Storage capacity was tripled along with the addition of larger, more spacious shuttle bays at the front of the pod.  The original now blocked shuttle bays were partly converted to saucer storage (although they could still serve their original purpose in case of a separation).  Other ventral inaccessible systems like grapplers and weapons had equivalents installed on the pod which were integrated into the main systems.   Like the shuttle pod, those original systems were not removed but left operational in case of an emergency separation.  A large pair of hydroponic bays were installed in the pod as well as a huge secondary water storage tank.  On Captain Archer's frequent and insistent recommendations, this secondary water storage tank was made accessible to the crew for both exercise and leisure activities.

Finally, emergency living quarters for up to 200 in cramped conditions were included both for humanitarian rescue missions as well as in case of catastrophic saucer section damage as part of its secondary life boat role.  To better facilitate this role, maneuvering thrusters and an independent life support systems powered by a microfusion reactor were installed that could maintain the pod's crew and systems for months when separated as well as backup or supplement the main saucer systems as needed.  Separation under ideal circumstances takes less than an hour including the movement of key supplies and equipment (like shuttle craft) back to the saucer section.  In case of an emergency, it can be accomplished in less than two minutes though.

The attachment of the pod, affectionately nicknamed the "pot belly" by crews, was a popular upgrade in the NX fleet as it significantly improved the quality of life on ships during extended mission durations.  From a practical perspective, the added mass and bulk was absent the negative effects on maneuverability, speed, or defense one might expect.  The addition of thrusters and the microfusion reactor on the pod counteracted the added bulk at sublight speeds whereas the modest improvements to power output and efficiency made during a simultaneously scheduled tuneup of the original warp reactor and plasma injectors made performance changes at all warp speeds negligible compared with the original design.  Hull plating as well as tactical systems on the pod were patched into the main systems and operated within the same parameters as other late NX era ships (although these systems were inoperable after emergency separation).  The actual attachment of the NXL module to NX class ships took less than a week in space dock with the majority of the time spent actually overhauling the existing propulsion systems in the original NX hull prior to connecting the pod.  Despite increasing the available usable space on the ship by over 40%, the added crew requirements for the pod were minimal at only a dozen extra crew compared with a standard NX ship.  This was because the added space was designed for uses that typically didn't require frequent or intensive crew monitoring (such as the hydroponics and cargo bays).

This design, despite its popularity, was only ever planned as an interim design until the deployment of the formal refit and as such always had an expected operational expiration date.  The refit with its much improved propulsion, navigation, and tactical system upgrades slowly phased out the NXL module over the course of a decade.  The construction of the newer Columbia class ships with the refit systems already integrated meant that those ships also had no need for the interim NXL modules either.  Despite its relatively short operational service life, it remains an interesting and successful footnote in the annals of Starfleet ship design on the road to the iconic saucer and secondary hull aesthetic.

Friday, July 8, 2016

NUBLITZ! demo army lists and pics

The 2016 update to the Heavy Gear rules came out this past weekend.  While I didn't have a chance to go over the actual rules in any detail, I did take a look at the army construction chapters.  One major change is that the number of different UAs has been significantly reduced.  I'm glad to see this seeing as how I both privately (prior to) and publicly (post release) advocated strongly for that unsuccessfully back in 2013/2014.  With this latest slimmed down army organization, I decided to see if what I could do with my painted Blitz scale models and eventually my new Rafm scale collection. 

A few years back when I was trying to demo and drum up support for the game, a player commented after an intro game while skimming through my rulebook that he was surprised to see more than just gears in Heavy Gear.  At first I was perplexed at the comment until I took a look at my collection at that time (100% gears) as well as the name and cover art of all the books.  Since then, I made it a point to include more than just gears in my forces despite my personal interests, especially in the forces I bring to demo.  Gears are still the overall main focus of my collection but not an exclusive one.  Additionally, I wanted to make sure I brought models that will use a variety of weapons, deployments, stats, and special rules instead of just frontline commandos backed up by backfield bruisers (my initial southern army).  If those weren't enough restrictions, space was also limited in my carrying case so all three forces had to fit in mostly a single foam tray.  From my collection, here are the various lists I came up with at 132pts (+-1pt) each after evicting some Robotech models from their foam slots!


 Starting with the North, we have a Fire Support squad of two Grizzlies (including the CGL) and two destroyer Jaguars.  The Jaguars belong honestly more in an old time strike squad but the low tech but devastating explosive brute force weapons can also fit here in the Fire Support squad .  They'll likely be deployed up on the front lines guarding the 5th member of the squad, a support unit Cheetah.  The Cheetah recon gear is there to provide FO as well as some ECM support for the squad.  The second squad is a high tech strike squad of two Arrow missile Jaguars and two laser sniper Flash Jaguars led by a Cheetah.  To round out the three activations, I have a platoon of four anti-tank infantry squads.  With this force, I've got a representation of indirect fire (guided and normal), some advanced weapons like lasers, infantry and their unique rules, and some solid electronic warfare.


Opposing them is my Southern Republic gear regiment.  I went with extremes here in that I took both the most basic gear squad (GP) along with two of the most elite options in that army.  The five Jager GP squad includes some grenade launchers/LAC combo rifles as well as light bazookas and are led by a command Jager.  This was important to me as I didn't have any "trooper" class gears like the hunter in my northern force.  Backing them up is a strike squad of two bruiser King Cobras with their haywire damage causing particle accelerators.  Finally, we have a special forces stealth squad of two three various mambas and a chameleon recon gear.  This squad utilizes both the stealth and paratrooper rules potentially in a game.  I'm still a little bit hesitant to include the stealth squad though as the previous Blitz stealth rules just made the game not fun when used.


Rounding out the final force is my Nucoal tank regiment.  The standard 132pt force consists of two squadrons of missile and laser armed Fusilier Javelin hovertanks backed up by a pair of larger, tougher (but slower and more expensive!) Longfang Hetairoi hovertanks.  This covers the previously unused hover mode movement as well as multiaction larger vehicles.  For smaller games, I've included two support squad hover gears (Chasseur mk2 gunners) to add a bit of granularity to potential squads at lower point totals.

With these three armies, I've got a variety of weapons represented as well as all but one of the major classes of the titular gears.  Flanking, airdrop, and normal deployment is represented along with special categories of rules like stealth and electronic warfare.  Finally, nongears are shown as both infantry as well as tanks are included.  I attempted to include support options like turrets, conventional tanks, and aircraft alternatively in the southern force as well as an APC in the north but neither the points nor the remaining available foam slots worked out.  I'm also missing a strider in a list as well.  I had initially planned to use my Rafm Kodiak as a blitz gearstrider but there are lingering questions about his size relative to the orginal model on top of the fact that couldn't fit in the case without removing more (necessary) robotech demo models.  I may eventually revisit that decision though in the future though.  Next up will be my Robotech demo lists and models that I keep in the same case.

Saturday, June 25, 2016

RAFM Army so far...


A group shot of my force as of today.  I somewhat successfully cast a lower detail head for the third jaguar and magnetized it and a normal head for easy swapping as needed.  While it isn't as sharp as the original metals, it's better than the picture indicates.  I have to stop thinking of the groups as squads as I've been referring to them since they're not actually legal squads.  From the 10 models, I can field two legal squads out of the three strike, dragoon, and fire support options.  My next trio was intended to be Hunter variants but I think I'll hold off until the new rules come out hopefully next week.  Three of the four hunter variants I can build don't actually exist in the current rules and would require significant conversion and/or substitution.  I'm hoping some more options open up with the 2016 revision.  Alternatively, I could start working on some infantry in the meantime or even start my southern force.

Thursday, June 23, 2016

Recon gears assembled

Here's the currently complete recon group.  I built the third cheetah as a White Cat with two small conversions: the rocket pack and the EW forearm bit.


I might change the rocket pod back to the vertical one if I decide to build another stock Cheetah (my only planned repeat!) as I only have one left.  My group photos turned out really badly due to the lighting so I'll have to wait until the weekend to try again in better and hopefully natural light.  I also had another idea about the Jaguar heads and decided to try casting the fire jaguar head instead of the more modern one that I initially tried.  I'll post an update about that tomorrow along with some group shots and further ideas this weekend.

Wednesday, June 22, 2016

Cheetahs on the prowl (and Strike Squad Redux)


I did a partial repositioning of the Arrow Jaguar's head and missile launchers.  Initially, I wanted the model's front view to look as similar to the old RPG art as possible but unfortunately the pose overall suffered IMO.  I took off the head and missile launchers, scraped clean the superglue, and repositioned them to look a little more like I initially intended.  I imagine the advanced tracking systems on the Jaguar have the missile mount on that side turn to where his sensor cluster (the head) is pointing so I turned the one mount and left the other facing straight forward (but still at the RPG tilted angle from the vertical.

Next up, I worked on some cheetahs.  These guys were less time intensive as I didn't thankfully have to (so far!) worry about mispacks and the conversions were relatively minimal.  I clipped and repositioned the normal cheetahs arm to infront of him and added a Blitz scale dagger to liven up the pose a bit more.  As usual, I swapped out the curved rocket pack for an angular one.   Additionally, the pic showed me that I missed some spots when stripping and reposing this model so I'll have to go back and do some concentrated scrubbing tonight.


The second model from the recon squad was the strike cheetah.  Whereas the normal cheetah is a mix of Electronic Warfare and defensive capability, the strike cheetah focuses more on the latter and adds some offensive punch.  Initially, it was an aidrop capable unit but strangely it has been split up into three separate bazooka cheetahs, only one of which is airdrop capable.  Either way, here is my Metal Cat/Strike Cheetah/Para Strike Cheetah/Silver.  The changes to the stock model were adding a pack gun to the left hand, swapping out the Rapid Fire Bazooka for a Light bazooka, and the rocket launcher swap.


Next up will be the White Cat Cheetah variant and some group photos!

Tuesday, June 21, 2016

Strike Squad done... sort of...


I tried various possible solutions over the weekend to my issue of the mismatched Jaguar heads this weekend.  Raiding the various bits boxes didn't help and several different attempts at press moulding just ended up with the following mostly low detail and frequently unusable bits.


The two best cast pieces still had detail issues on the bottom half (although the less detailed top turned out fine) so I decided to cut off the bottom and try to convert existing blitz scale heads into the bottom portions.  Unfortunately, it just looked like the blitz heads were wearing a small hat instead of a cohesive single head.  In the end, I settled and used the two Fire Jaguar heads as the normal heads and the Thunder Arrow variant used the mispacked hunter head. 


I'm not entirely happy with the pose on the missile launcher commander model.  I was going for a "follow me, men!" type raised arm but instead it looks a bit more like a Papal wave unfortunately.  I had planned on turning the torso more but then the head wouldn't be oriented in the same direction due to the missile launchers.  I may revisit this pose in another few days after I finish the next squad.  I also converted the MAC to a bulkier version using some 40k and Robotech bits.  The MAC is one of the worst offenders in the underscaled weapon department for Rafm era models with the supposedly bigger weapon coming in smaller in volume than the LAC and even the pack gun.  Here's a side/back view of the three.


Next up will be the three gear Recon squad of cheetahs.

Saturday, June 18, 2016

Forming a Strike Squad


I decided to follow the template set up by the Fire Support squad in making each model in the squad a unique variant.  The models that I had to choose from were two Fire Jaguars, a Jaguar Predator, and a stock Jaguar.  The Predator was out as it has no equivalent in the current living rulebook (LRB) so I decided to turn it into a bazooka armed Destroyer variant instead.  The stock Jaguar, while supported, was too similar in loadout for my tastes as the two Fire Jaguars (all three wielding MACs) so I decided to try and convert it to a Flash Jaguar instead.  For the Flash variant, I thought it might be nice to convert the arms into a folden across the chest position as opposed to simple at its side.  I took some cutting, pinning, and filling but I'm happy with the final result.  Finally, I decided to try and convert one of the two rocket based Fire Jaguars (the unassembled NIB model) into a missile firing Arrow Jaguar instead to stand alongside the assembled Fire Jaguar.  Picture below are the Destroyer and Flash variants.


Unfortunately, when I opened the three blisters I had (one Fire Jaguar was already assembled and painted), I noticed that every single Jaguar head was different.  One had the extended visor just as the assembled Fire Jaguar, one was angular similar to modern Jaguars, and one was oddly curvy but not very similar to the cury Fire Jaguar heads either.  Unfortunately, the engine in that pack also didn't match and it appeared that I had yet another RAFM mispack.  From looking at various pics online, I had a hunter "bits" plastic bag in my Jaguar blister instead of the correct one.  You can see the various heads in the pic above as well as the engines below.


I decided to only build three Jaguars (similar to the three Grizzlies... not including the Kodiak commander) since I only had three correct matching engines.  The heads, however, were a different story as I'm still not sure what to do.  On a lark, I figured I'd try to email Rafm and see if they had any extra bits left over from that era.  I realize it's a very long shot and hopefully they'll be able to help.  If they can't my only options will be to either use wildly different heads or try to press mould additional heads.  For now, I'll hold off on the decision about the heads and next build the last Arrow Jaguar addition to the squad.

Tuesday, June 14, 2016

What squad and which variants next?

Just a quick update today.  I mostly took the weekend off but tonight I swapped out the Kodiak rocket launcher for the larger one the grizzlies have for consistency. I've also been considering what squad to build next. My general choices given the models I have on hand are general purpose, recon, and strike squads. Personally, I'm leaning towards the strike squad of Jaguars and to a lesser extent the recon squad of Cheetahs.

With the Fire Support grizzlies, the blisters were all different with vastly differing bits that couldn't be replicated easily... but that isn't necessarily the case with either the recon cheetahs or the strike squad jaguars. For both squads, I can build either four different models as I did with Fire Support squad or build a bit more optimized two pairs of two variants with some minor conversion. For instance, I have two normal cheetahs (one built), a cheetah fang and similar strike cheetah, and a white cat and similar white cat EMH. Any thoughts? I'm leaning a tiny bit towards different loadouts for the squads mainly for visual variety as opposed to a cohesive looking or mathhammered efficient force.  Any thoughts?

Finally, I'm debating how to base the models.  Initially I had planned on buying some packs of 40-50mm lipped circular bases but then realized I still had dozens of 40mm bases from Robotech that I'll probably never end up using.  The kodiak overhangs a little bit but even the fire support gears fit well enough on them.  

Saturday, June 11, 2016

Kodiak Destroyer Conversion

Here's the final grizzly family member in RAFM scale.. my Kodiak Destroyer um... chaplain... or duelist... or army commander... not sure which (or what combo of those) yet! 


I changed up the rocket pod just like with my previous gears (although using a smaller bit to signify the lack of dual pods in the current rules).  Due to the relative size of the protrusions like the engine cylinders and the bazooka, I frankly didn't have much posing options.  The arms pretty much could only be elevated as much as they arm due to bumping up against the engine and the torso couldn't really be swiveled much either.  In the end, I decided to go with a more on purpose looking static pose trying to make lemonade out of lemons.  I took off the pack gun from the left arm  (as well as the circular rocket pod) and drilled out the hand.  I converted my last 40k grey knight halberd into a duelist weapon/melee staff similar to the one used by the gearstrider Scimitar.  I then added a few cloth bits (also from 40k) to make the character model a bit more similar to the cover art of the original northern Blitz book (and the art on the current Northern chapter page in the living rulebook).  I considered adding back a folded pack gun like I did to the Crossbow grizzly but ultimately decided against it (as well as the APGL) as I thought the model would look too busy. 

Here's a group shot of all four together.


I was relatively surprised by the similarity in size (minus the missile launcher) of the Kodiak to the other grizzly models.  This matches the RPG fluff on which these old models were based but I suppose I just got used to the injected size differences between classes in current blitz.  I had hoped to use the Kodiak as a Gear Strider in current scale Blitz but it's a bit smaller than I had hoped.  The Scimitar (according to the original DP9 press release) is 68mm tall but they didn't state to which part of the model (it has a humpback tower/turret behind and above the head).  I assume that it is to the literal top of the model; in the case of the Kodiak, it's about 62mm to the top of the missile launcher and about 52mm to the top of the head.  I'll have to actually see (and hopefully compare) it to a real Scimitar both in height and bulk to see if it's a worthwhile substitute.  It's not too much of a problem in the current living rules as the LOS by default is substituted by a rectangular profile regardless of the actual model dimensions. 

Finally, I can deny it no longer... my new cell phone camera sucks at taking model pictures.  Part of the issue is the time and location of the pics (in the evening when I can work on the models and in the not so bright basement where I do the hobby work) but the camera app doesn't have great features as well (like no dedicated macro function).  I tried retaking some pics last night with my old dedicated digital camera (a simple consumer model.. nothing fancy) and it was a little better but still not much.  Today, in between clouds, I tried taking some natural lighting pics and will be replacing the previous blog entries with the better pics where possible.  Without further whining about my lack of photography prowess, here are the new better but still not great duo pics!


Thursday, June 9, 2016

RAFM Grizzly Three Amigos


The third grizzly fire support gear is built!  I decided to upgrade the third grizzly from a standard crossbow variant to a thunder command gear as well.  The change ruleswise just adds some comm boosts and a satellite uplink and must be used as the squad commander.  Modelwise, I made a few more changes in line with the old RPG art.

The assault/destroyer grizzly (bazooka guy) was supposed to have a moderately upgraded comm signified by a single bunny ear on the head in the dog.   In the current rules, the destroyer gets no such buff so I left the bunny ear off.  The thunder variant though has a full set of ears which worked out well since I now had access to two bits.  Additionally, I added a sat uplink cone to center of the backpack from my smaller scale blitz bits box.  It's technically supposed to be off to one side but that wasn't a particularly sturdy conversion so I glued it centrally instead.  Finally, the "pointy" arm looked a bit more commander-ish so I swapped it out from the Destroyer variant where I suppose it was supposed to be a sort of arm stretched out counter balance to swinging the bazooka around.


And by special request, here is a size comparison between similar Rafm and current metal Blitz scale models.  From L to R:  cheetah scout, jager/hunter trooper, jaguar elite, and grizzly fire support gears.  I don't own any gearstriders though nor any normal striders unfortunately.  


I haven't assembled my Kodiak yet but he is the next gear I tentatively had planned on building next.  I dry fitted some pieces though and I was surprised to see that, while bulkier, he isn't much bigger than standard grizzlies unlike in blitz scale.  I had been hoping to use him as the northern Scimitar gear strider (and the RAFM King Cobra similarly for the Drake) but there is a chance he might be too small!  When I finish the Kodiak, I'll try and do another comparison.


Wednesday, June 8, 2016

I think I spilled some JRPG on my models...

I worked on the second grizzly and took a few pics.  Here's the previously mentioned Destroyer Grizzly variant built and converted:


The general basis for the fig is the RAFM assault grizzly but I've upgunned the bazooka to a heavy version as well as changed the other weapons to match the current rules.  The arm is the same but the original medium bazooka had to be clipped/filed off and the new one glued on.  The end result is a bit comically huge like a JRPG weapon which I wasn't expecting but the other one was a tad too small as well (especially since it'll be the weapon on a bunch of smaller trooper gears as well).  With the larger weapon size, the position of the engine cylinders actually became an issue for posing and the one I chose is basically the most level right arm pose I could get.  The waist was angled down initially and when I put the torso on the gear always looked like he was looking for a dropped coin or his keys on the ground... so I extended the waist a bit in the front which angled the torso up just enough.  I drilled a hole in the hand and put in a pack gun and added the usual bits including the same rocket launcher.  The rockets aren't actually WYSIWIG but the new rules simplified grizzly rockets all to the same statline so shouldn't be an issue.  The original strike grizzly is supposed to have a smaller rocket on each shoulder and the destroyer probably has them on the back of the engine (they're strangely never shown in the rpg art).  I had some bits lined up for the heavy spike gun on the left forearm, a spare fragcannon, and extra head bunny ear antenna but decided to go with the modern loadouts instead.  Here's a group photo with the Rabid Grizzly...


Next up (probably tomorrow) will be the Crossbow Grizzly blister that I'll also convert into a Thunder command variant.  

Tuesday, June 7, 2016

RAFM Grizzlies spotted incoming!

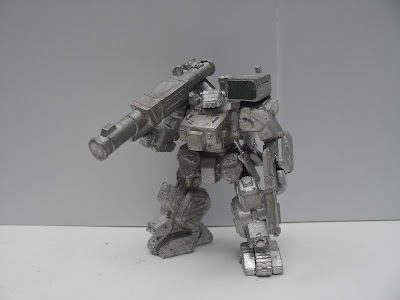
So it took me a few days but I cracked open a few of the blisters.  As the grizzlies were some of my favorite, I decided to open those first and start on the core of a fire support squad.  I didn't notice it at first but my rabid grizzly was a strange mispack as it was both missing bits and included USED bits from another kit with 20 year old yellowed super glue on the bottom of the head!  I guess QA wasn't as tight as it is now back in the day (see more below).

I definitely remember the models as being prettier at least in the blister than they are in person 20 years later.  Besides just the missing/swapped used piece above, there are frequent mould lines and minor slips as well (especially on the rocket pods).  The sculpting while nice is very antiquated at times, especially on the rocket packs.  The packs look like someone just took a needle and kinda sorta poked holes in semi dry green stuff, eyeballing the angles, number, and orientation.. and that's probably what actually happened, lol!  Pegs on arms simply don't fit into the holes on the shoulders and flat joint surfaces are convex instead.  There's definitely alot more prep involved in the classic models than compared with modern (soon to be replaced) metal Blitz scale offerings. 

Initially, I had a hard time deciding which variants to actually build and exactly how to build them.  For instance, I have an assault grizzly pack with all the necessary bits to build a 1st edition RPG loadout assault grizzly.  I could do that but the variant no longer exists in the upcoming Blitz rules.  Instead, the only bazooka armed Grizzly in the new rules is the "destroyer" variant which was an upgrade of the assault grizzly with an even bigger bazooka.  No problem, right?  Except that the loadouts for everything but the bazooka have changed for the "destroyer" in the 20 years since.  The Hbzk is the same but the rocket packs changed location and type, the mortar magically reappeared, the heavy spike gun reverted down to just a simple knife, and the frag cannon (think mecha sized shotgun) turned into a pack gun (think mecha sized uzi).  Of course, the pack contains almost none of the above.  Looking through my 20 year old bits pile (some original rafm bits were still in my 40k ork bits pile!), I found some needed parts so that I wouldn't have to open another blister just yet and scrounged the rest from the other grizzly packs (assuming they were extra there).  I decided to go with the modern loadouts whenever possible.  Sometimes I was restricted by the actual physical size/position of the parts, other times they just weren't available, and in one case I just wanted to change the asthetics. 

I started with the Rabid Grizzly as I initially thought it was the variant with the least amount of changes necessary.


As you can see, I put some green stuff on the front of the ugly pin hole rocket pack; I'm going to try instead to just paint on the rocket pips.  I initially tried some quick impression sculpting (pushing some existing modern rocket packs into the still wet green stuff) but it didn't work well so I just flattened out the surface instead.  Also, in the original RPG art (and the Rafm models), the angular northern gears had curvy rocket pods whereas the curvy southern gears had angular pods.  I decided to reverse that to have the aesthetics match.  You can see the original hex base that came with the models as well as some optional bits that I'm considering using.  Even back in the original Rafm days, the gears spilled over the edges of their bases.  I think I'll instead base them on 40-50mm round bases (which actually would be legal in current blitz!).  I'm also considering adding the grenades and ammo cannister to the model as shown below (on the butt plate and forearms) but I'm not sure if it'll end up making the model too "busy".  Finally, the head is technically incorrect but it kind of matches the "extra armor" motiff of the variant (you can see the correct distinctive head when I post the destroyer variant).  I also added an extra armor plate over each shoulder joint to give it more of a tough look.


I'm a little torn on that as they'd cover up the distinctive butt plate design of the gears.  If I did it for one gear then I'd probably put extra ammo for each one in that weapon (and they do that occasionally with the current metal scuplts as well).  Particularly eagle eyed HG experts might notice that I cut off the butt plate from the engine (they're moulded as one piece) to give the model a bit more variety in posing.  I'm not as much of a fan of keeping everything in back all in exact alignment and apparently neither is the current staff at the company as they have had them moulded separately since.  Thanks again and let me know your thoughts if any on the addition of the bits issue.

Sunday, May 22, 2016

Apologies for the absence!

It's been a while since I updated the blog and it might be a bit longer before I put anything up with real substance.  It hasn't been a particularly good 18 months for my gaming hobby and the lack of actual games has resulted in frankly a lack of enthusiasm in building and painting models to use in those non-existent games.  I've never liked the Apocalypse all the time! direction 40k has taken in the last two short lived editions and Halo Fleet Battles and Robotech both failed to launch locally (and seemingly worldwide as well).   Heavy Gear has had some hurdles (some avoidable, others not) but is progressing SLOWLY but at least the end of that project is in sight sometime late this summer or early Autumn.

Finally, my FLGS (friendly local game store) announced that they were closing permanently so my chances of actually finding new opponents to try out games I'm interested in has dropped significantly as has the possibility of spontaneous gaming with friends and acquaintances.  The next closest store (roughly 70 miles away directly across a major US metro city) that I'm familiar with is just too far to travel without a definitive game scheduled ahead of time with a reliable opponent (that last part being an issue in the past).   For UK readers, the "club" model just doesn't really work well in most of the US including mine so that isn't a realistic workaround either.  Neither I nor any gaming friends have enough terrain to host games ourselves for the most part (barring some space terrain and cardstock buildings) so that is largely out.  My tabletop hobby always has been centered around the neighborhood (or in my case 25 miles away) FLGS. 

I made my first major new gaming acquisition in a long time (since my Halo Fleet Battles starter mid 2015 iirc) with the purchase of some original larger scale Rafm Heavy Gear minis.  I'm frankly not sure what I'll do with them (Build/paint them?  Sell them?  A bit of both?) and in hindsight the purchase was largely fueled by nostalgia more than any concrete hobby project plan.  I've still got the same 40k Tau broadside sitting on my painting desk although I have base coated and black wash lined the model since last posting about it.  If I start back with anything, it would be finishing that model and therefore the WWII themed formation it is a part of.  That's it for now and I'll leave you guys and gals with a few quick pics of my recent RAFM haul.


I now have more of those original scale models than I did back in the 1990's and I'm left with the classic toy quandry... do I open them up to look at and play with them or keep them in the original packaging to keep their value up!   I suppose that is a good problem to have.  :)

Wednesday, January 6, 2016

2015 and Beyond... Part II

And now we get to what I unfortunately did not finish during 2015 as planned.  First up would be my long planned but stalled 28mm VOTOM/Heavy Gear squad.


While I did try a few paint schemes and techniques like traditional painting as well as washes/drybrushing, I never got the models to quite look how I wanted them toand stripped them down.  I dont think I ever covered it here on the blog but I also converted a snub cannon for the fifth model as well as some extra comm gear for the Jaeger Command squad leader.  I still plan on working on them eventually but the wait and see approach to the Heavy Gear kickstarter I took somewhat drained my enthusiasm for the project.  Perhaps the potential fulfillment of the rewards this year (delayed four months or more so far) will have the opposite effect.

The second project that I had planned but didn't complete was my small Space Wolf 40K Primarch ally force.


While I didn't touch Logan Grimnar on the right, I did a few coats of grey and some metallics on the Iron Priest on the left.  I again wasn't quite happy with the preheresy scheme effect I achieved but I also wasn't unhappy enough to strip it off either.   We'll have to see if I end up able to salvage it in the end.  Like the VOTOMS above, I don't really have a practical use for these in any future foreseeable game so they'll likely stay on the backburner for a while.

Finally, I'm back to what was posted on my last real hobby update and my first really hobby work of the new year...my 40K Tau Broadside conversion.


He's currently primed green with recesses washed black and ready to paint.  With even my glacial pace of painting, I should be able to finish him completely this month and be done for a second time with my Tau side project.  

After that, I'm not sure what I'll do in what order in 2016 but I do have a few ideas knocking around my head.  The easiest would probably be a set of house rules for improving (hopefully!) the effectiveness of fighter/bomber wing combat in Halo Fleet Battles as well as incorporating the boarding actions into the normal mechanics of the rest of the game instead of being entirely separate.  My tentative name for the house rules would be "Their Finest Hour" and I hope to start posting them next month.

Besides my two main stalled projects above, the only hobby work I've got planned is to repaint one of the new T-70 xwings in Poe Dameron colors after seeing the movie.  While I thought the movie was better than the prequels, it didn't entirely captivate me as I found most of the characters uninspiring (except Ray) and the plot too derivative of the original movie.  I did however like the battle scenes and especially the new xwing both in design and Poe's color scheme.

The other thing I'd like to do more of in 2016 is actually play games.  For a variety of different reasons, I only played a grand total of 4 games in all of 2015 from all game systems combined.  I'd probably focus on Halo if given a choice with the upcoming house rules needing some real world testing but I'm not particularly picky!  I'm not sure if my cellphone camera is up for it but I'll likely post battle report videos of any games I play this year both on youtube and linkef here on the blog.

Thanks as always for reading and I hope I didn't cause anyone to nod off while reading!  I've been pecking away at my tablet typing this so I apologize for any typos as I'll hopefully correct them in short order.


2015 and Beyond... Part I

I had initially planned on doing a detailed review of the year 2015 but something derailed my plans... netflix!  I had gotten a membership to the service for Christmas and ,instead of working on the final hobby project of the year and the year in review post, I've been watching things like Knights of Sidonia and Jessica Jones!  It's a bit late for a proper year in review but I'd still like to share a couple of some thoughts on 2015 and 2016 in a sort of State of the Blog address.

First, we'll start with 2015.  While it didn't feel like a particularly productive year, I did mostly accomplish several projects that I set out to do.  The first is my Farsight Tau ally army.


I actually completely finished this project around the summer but then ran into a bit of a snag as credible rumors started coming out about a new set of rules for the army.  When they did a few short weeks later, I realized I'd probably want to add another model to my small group to make it a functional force with the new rules.  I built, primed, and washed that final model (my Broadside conversion) but failed my will save vs Netflix and binged on some shows instead of finishing the model.  I do hope though to get it done this month though.

The next project that I worked on this year was my set of house rules for the Robotech Tactics minis game that I dubbed "Vermilion Squadron".


I got in early on the game's kickstarter in large part because of a promised set of small model count skirmish rules.  When half the rewards were finally released a year late (with the remaining half still pending and approaching three years late...grumble... grumble), the skirmish rules were unfortunately not included and got lost along the wayside.  I decided to try and make a relatively quick set of house rules to retrofit back into the game that functionality.  It wasn't as large in scope of a house rule product as my Heavy Gear houserules but I'm happy with the results.

The final main project that I worked on was two fleets for the newly released Halo Fleet Battles game.  I initially thought that I'd do only a single fleet that was easily divisible in half for demos; after finishing that first fleet, I decided to just make a proper OpFor for the game.


With a few non-modelled options like Spartans and Zealots onboard ships, I'm at around 900-1000pts for each fleet with regard to what I can carry in my foam case.  Not pictured above is the extra base of small UNSC frigates that replace the second large carrier for that faction.

Of course, not everything is rosy as I did have a pair of projects that I had planned to complete in 2015 that I didn't.  I'll be discussing them along with some initial thoughts on 2016 in the next post that I'll hopefully put out today as well.