Showing posts with label Farsight. Show all posts

Wednesday, January 6, 2016

2015 and Beyond... Part I

I had initially planned on doing a detailed review of the year 2015 but something derailed my plans... netflix!  I had gotten a membership to the service for Christmas and ,instead of working on the final hobby project of the year and the year in review post, I've been watching things like Knights of Sidonia and Jessica Jones!  It's a bit late for a proper year in review but I'd still like to share a couple of some thoughts on 2015 and 2016 in a sort of State of the Blog address.

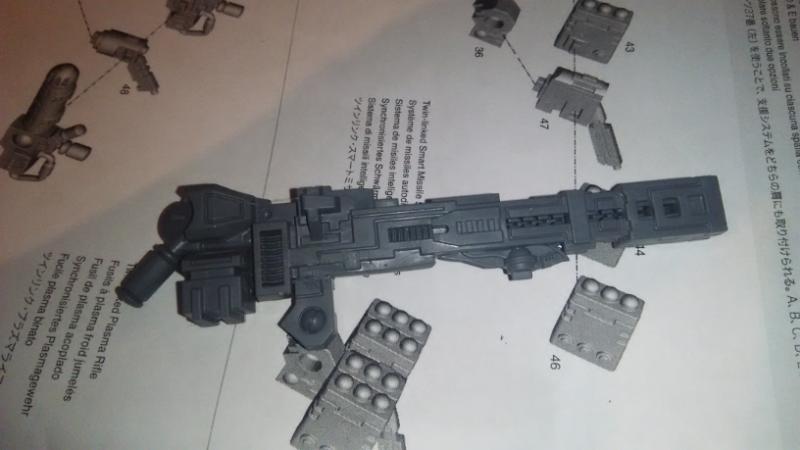
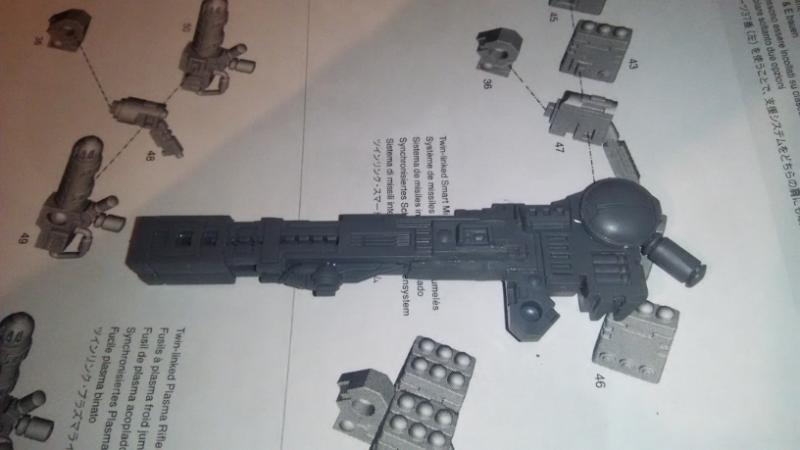
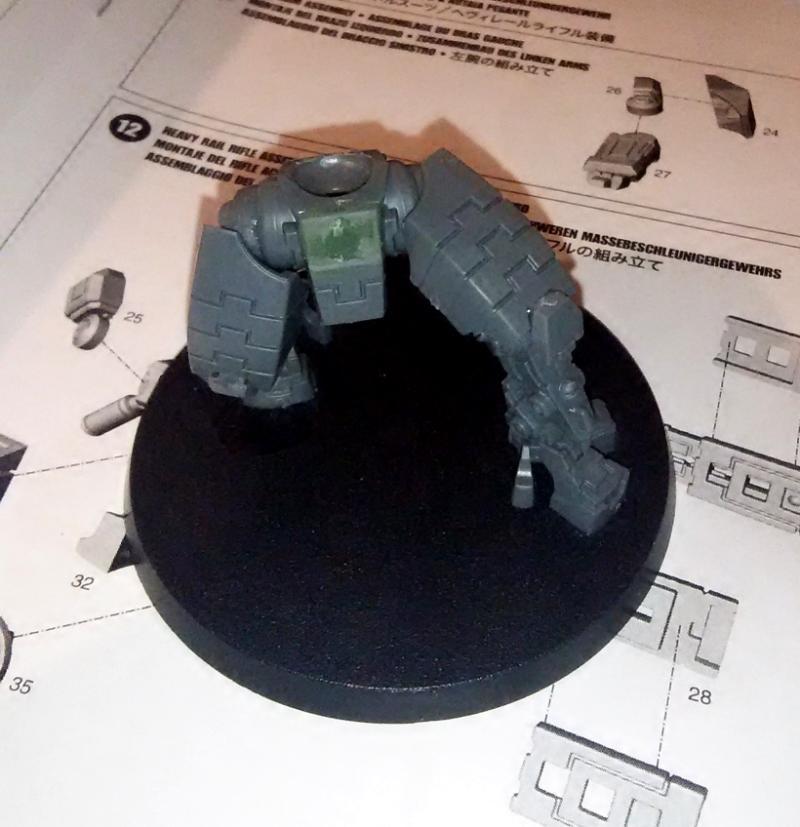
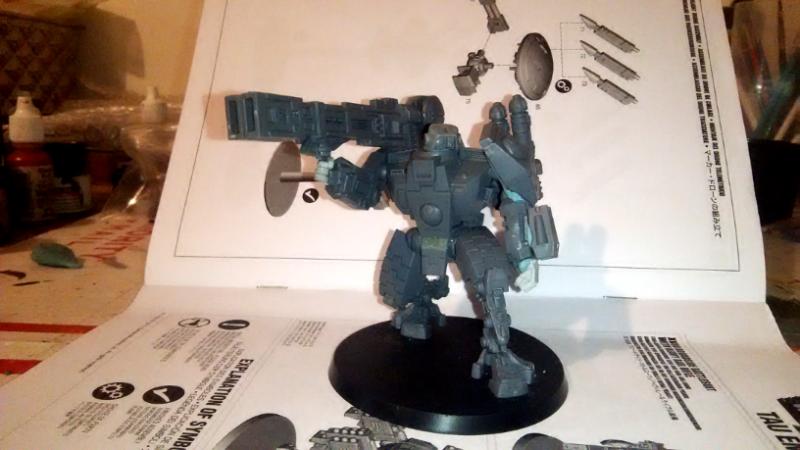
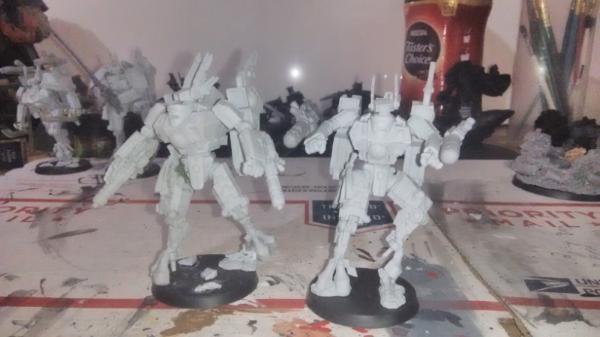
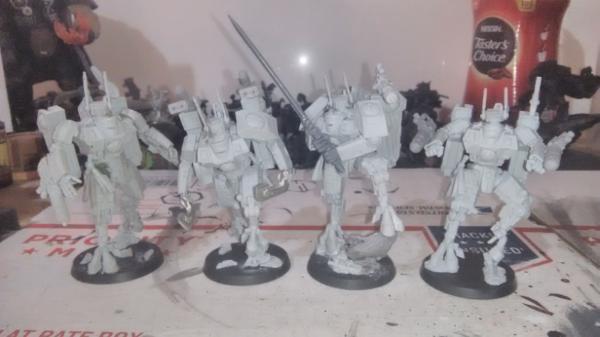
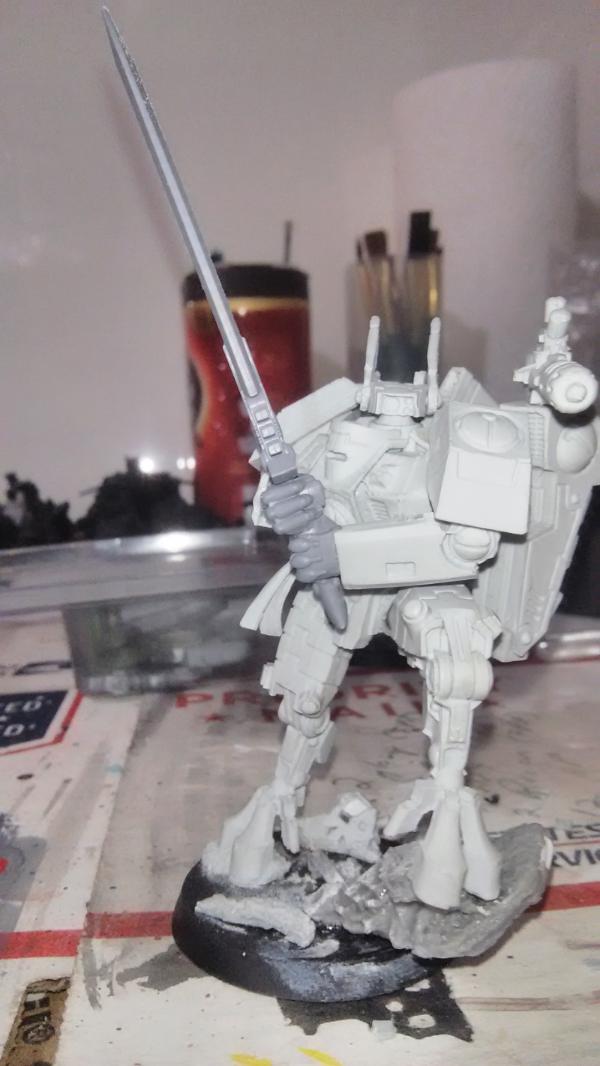
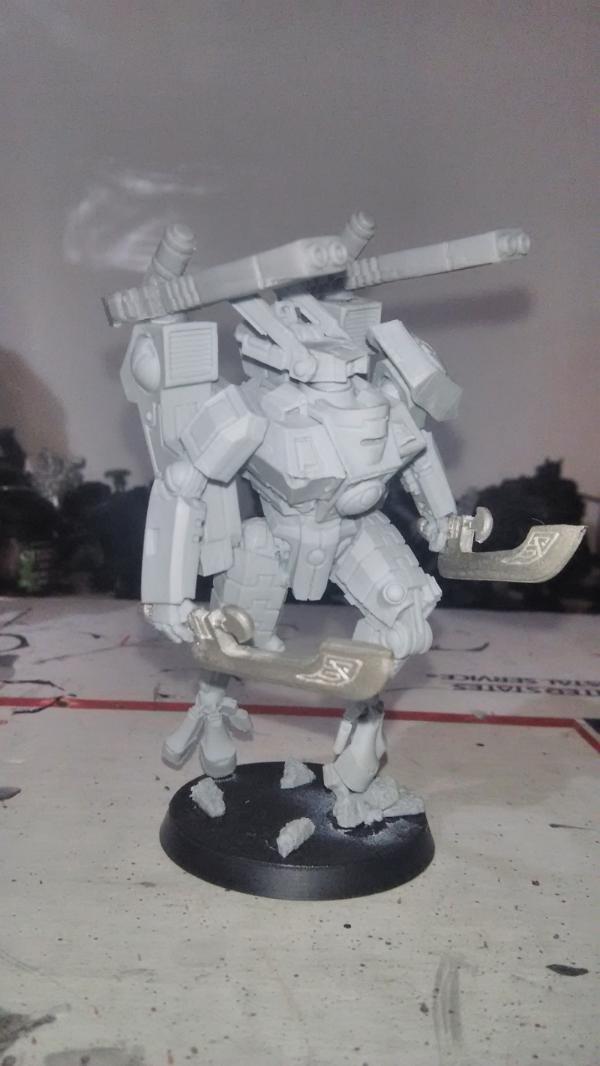
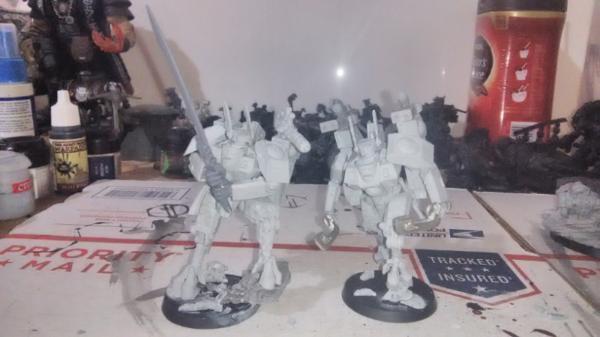
First, we'll start with 2015.  While it didn't feel like a particularly productive year, I did mostly accomplish several projects that I set out to do.  The first is my Farsight Tau ally army.


I actually completely finished this project around the summer but then ran into a bit of a snag as credible rumors started coming out about a new set of rules for the army.  When they did a few short weeks later, I realized I'd probably want to add another model to my small group to make it a functional force with the new rules.  I built, primed, and washed that final model (my Broadside conversion) but failed my will save vs Netflix and binged on some shows instead of finishing the model.  I do hope though to get it done this month though.

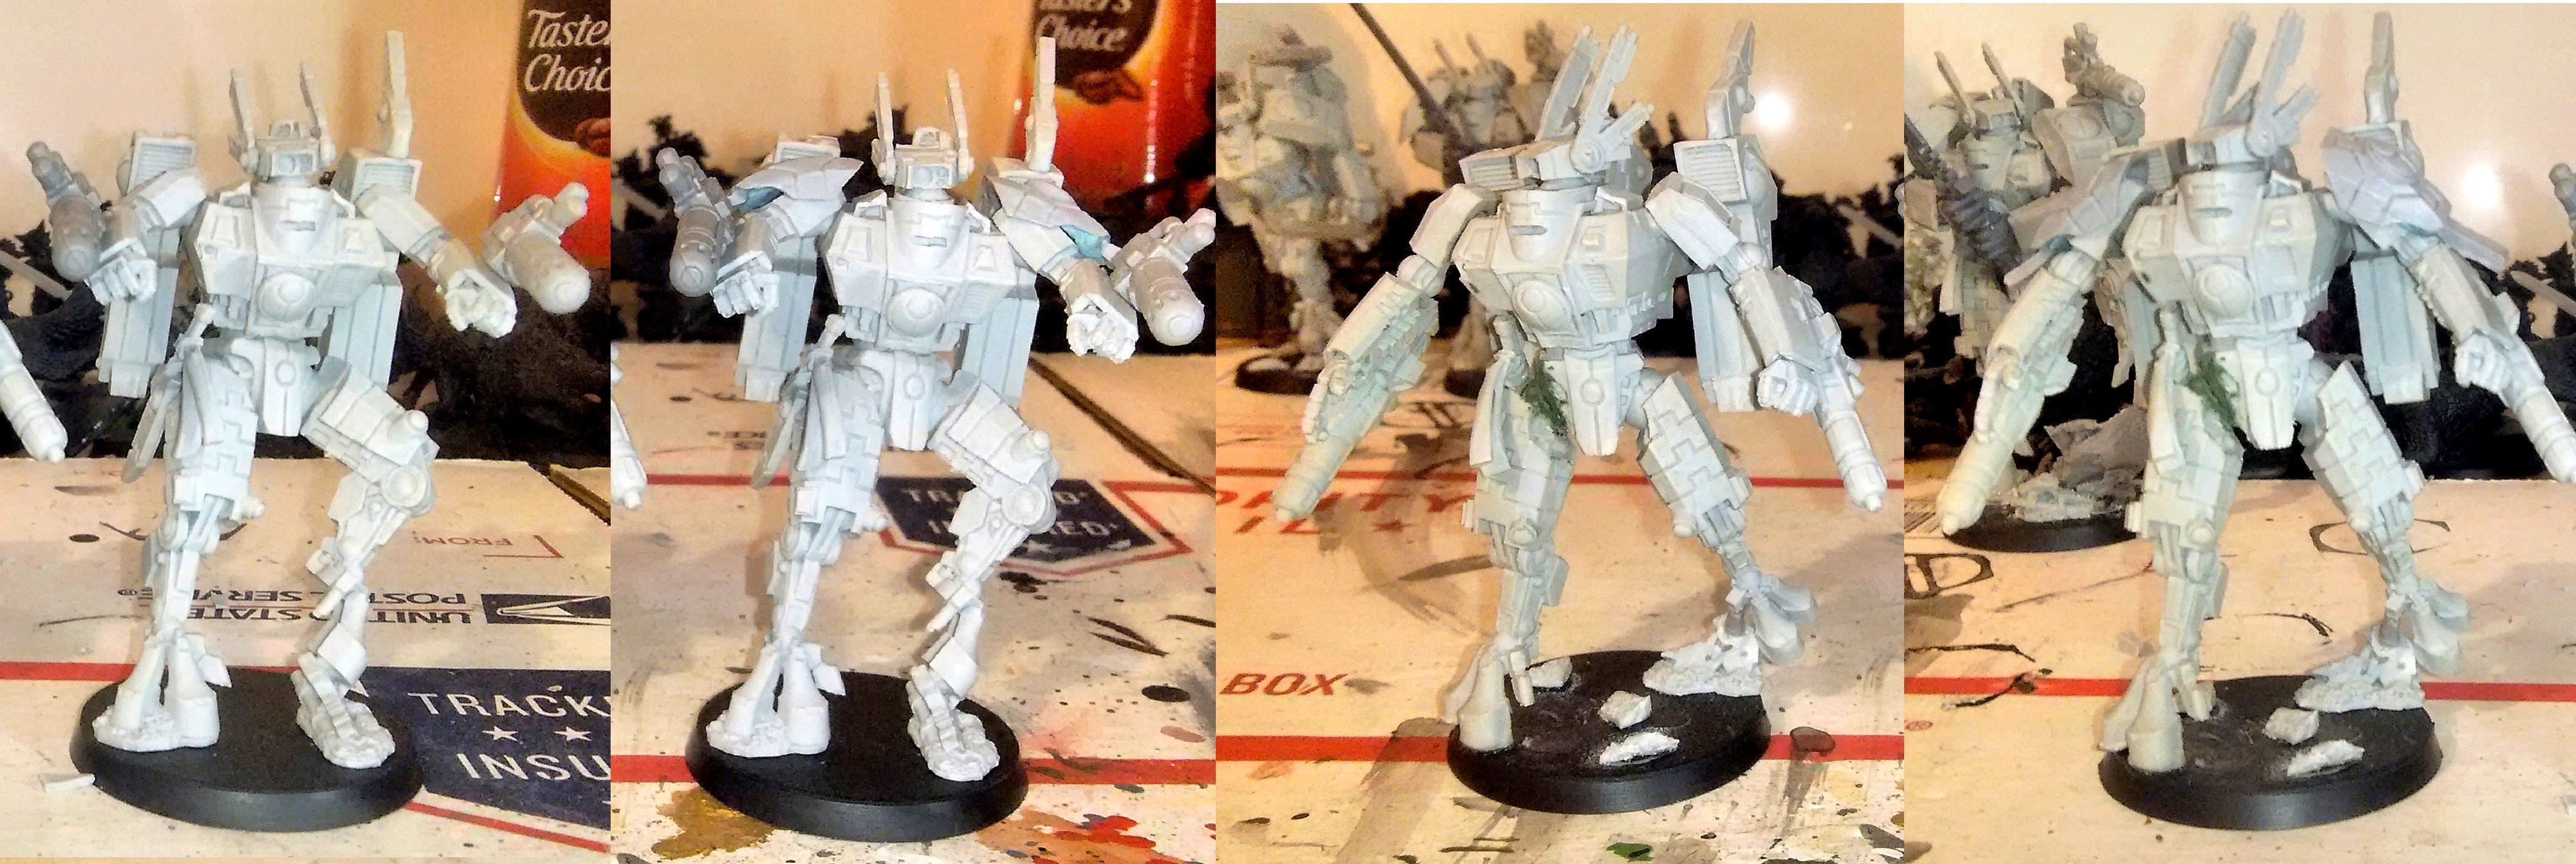
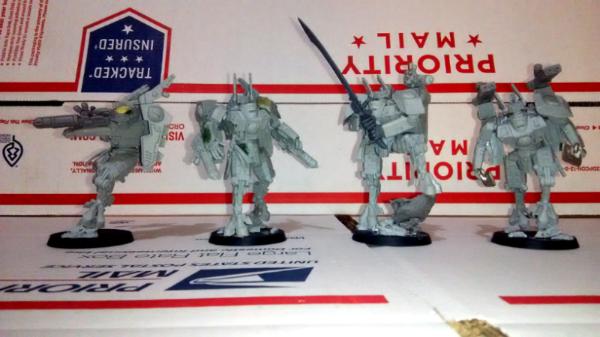
The next project that I worked on this year was my set of house rules for the Robotech Tactics minis game that I dubbed "Vermilion Squadron".


I got in early on the game's kickstarter in large part because of a promised set of small model count skirmish rules.  When half the rewards were finally released a year late (with the remaining half still pending and approaching three years late...grumble... grumble), the skirmish rules were unfortunately not included and got lost along the wayside.  I decided to try and make a relatively quick set of house rules to retrofit back into the game that functionality.  It wasn't as large in scope of a house rule product as my Heavy Gear houserules but I'm happy with the results.

The final main project that I worked on was two fleets for the newly released Halo Fleet Battles game.  I initially thought that I'd do only a single fleet that was easily divisible in half for demos; after finishing that first fleet, I decided to just make a proper OpFor for the game.


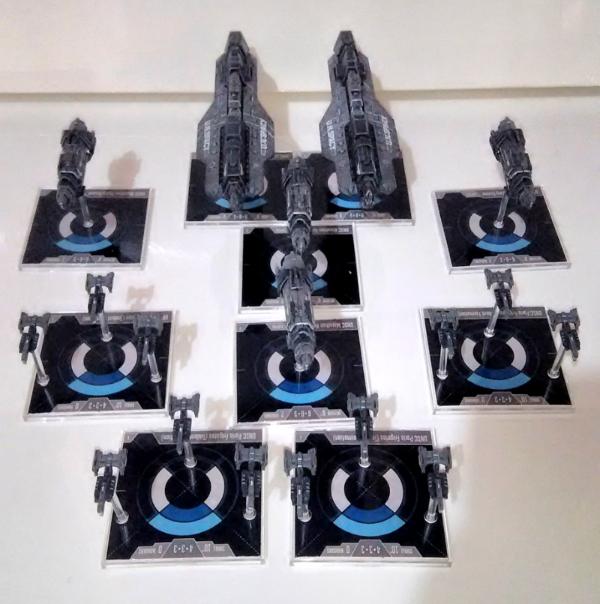
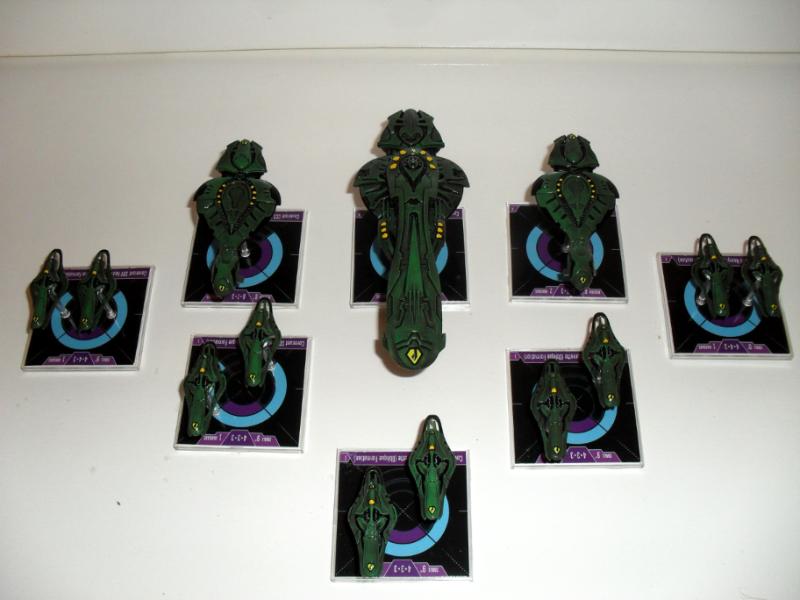
With a few non-modelled options like Spartans and Zealots onboard ships, I'm at around 900-1000pts for each fleet with regard to what I can carry in my foam case.  Not pictured above is the extra base of small UNSC frigates that replace the second large carrier for that faction.

Of course, not everything is rosy as I did have a pair of projects that I had planned to complete in 2015 that I didn't.  I'll be discussing them along with some initial thoughts on 2016 in the next post that I'll hopefully put out today as well.


Sunday, December 13, 2015

Bazooka Mecha Joe Tau Conversion


Unfortunately, I had to take an unexpected break from my Tau project due to delays in getting my broadside but finally got it a few weeks ago and worked on it this weekend after recently finishing two HALO Fleet Battles fleets.  I roughly followed my idea above with some tweaks of my own to customize it.  Sorry about the pics below as I was taking them while working, snapping pics as I worked on the next step (as evidenced by the instructions and still wet glue!).  While I did plan out and virtually measure twice, I had to improvise a bunch of changes on the fly.

Starting with the railgun, I test fitted it on the other shoulder but decided to keep it on the same side. It just looked better and was more reminiscent of an old RPG fav, the Rifts Glitterboy.  I decided to keep its original orientation instead of flipping it like my inspiration above.  I cut away the same large piece above (click his link to see his step by step photo) but decided not to use it as a grip.  It would be too bulky since I planned on using spare leftover Enforcer hands on the model.  I put on all but one of the original railgun bits (the sensor head scope) and filled in the remaining gaps on the other side where the other hand/arm would go with a spare Broadside "face" bit for the head (you get 5 or 6 with the kit).  I'll probably put a small antenna on the back disc area on the outside face of the gun.  I mounted the back of the railgun on the peg that attaches to the powerplant as well. Finally, for the grip, I decided o use the mounting rail for the seeker missile I wouldn't be using.


I knew I wasn't going to use the missile because I planned to use the bits for a conversion.  I'm building a retaliation cadre in which the broadsides are both relentless and can deep strike, neither of which they normally do.  So I made up some fluff that I'll post later about a new Broadside variant that trades sustained fire capability for additional maneuverability.  To show this on the model, I decided to skip the cooling fan under the powerplant and mount the seeker missile bit there instead.  You need to remove the tab above the back waist on the broadside and slightly trim the intake side of the missile booster engine but it fits as shown below fairly well with minimal fuss with the edge with the longer railing on the bottom. 


This conversion pushes the torso a tiny but forward and I had to trim off and gap fill the raised bump on the broadside groin guard as well as it bumped against the center bottom chest armor when dry fitting.


Since I'm going with an anti-heavy infantry theme for this cadre, I chose the plasma guns as my secondary weapon option. I tried mounting it different ways on the arm but thought they all looked too busy.  Instead, I decided to also mount it on the back.  When I used the normal spacer piece the instructions said, the barrels looked too separated for my tastes and jutted out too far when in the "launch" vertical position I planned on using.  I just trimmed them a bit on the inside face and mounted them directly onto the peg.  It's style over function though as if they were to rotate forward to fire then they'd be blocked bybtge shoulder pad without the spacer piece.  I suspect in fluff the earth caste has miniaturized an extension within the mounting to counteract this.  :)  Here is my initial blu tac mockup with most of the pieces.


I still wanted to show a support system on the model but I didn't like any of the existing ones on the left arm mounting so I tried tried using the remaining scope bit from the railgun.  I decided that too was too bulky and latter kitbashed a custom piece.  I used my leftover Yvahra Riptide head as it was squat and bulky enough that I thought it worked well with the broadside aesthetics.  For the arms, I used two sets of left forearms and right shoulders to lengthen the limbs.  The right railgun arm of the broadside was just too short and asymmetrical for my tastes and I had an extra from months ago when I ordered bits in my unsuccessful quest for alternate Riptide shoulder pads (detailed above).  It was a win-win situation!

I'll be working on gluing this together later tonight and I've already got a few tweaks in mind as well.

Saturday, November 7, 2015

The (Tau) Empire Strikes Back!


While I've still been slowly working on my Halo models, I've always had my future Tau models on my hobby desk staring back at me.  It's been a few months since my last tau update but I decided to put the project on hold for a bit as the Tau codex rumors started to gain steam this summer.  The new codex came out and I've been trying to see how both my main Tau army and the small Farsight force I've chronicled here fit into the "new" book.  My main army is large enough to give me a few options but the Farsight force needs more tweaking.

I initially planned to next add two Forgeworld remora drones next to the force but since FW has yet to update their rules but admittedly only been a few weeks.  While the option to use a small Farsight ally force of my existing models still works for now, there are two problems.  The first is that there are now rumors of a Farsight campaign book in a few weeks and also a redone enclaves subcodex in a few months.  With GW now officially embracing the "decurion" onion layeres formation style of army building, the rules that make my small force legal are likely to go away.  The second is that the new style of army building gives just too many freebie rules to ignore especially as any likely opponent will be using something similar for free as well.

The easiest way currently of achieving the same effect (a small semi independent crisis suit force) is to turn them into a retribution force from the hunter contingent.  In order to use that though, I need to acquire a broadside model.  I have a forgeworld xv-88-2 but it just doesn't have the bulk necessary to accompany my enforcer suits so it'll have to be the current plastic.  The best loadout currently is the missiletide suit but I neither like the look of that version nor does it fit into my theme of a small anti-elite armor force.  Instead, I'll be using the currently unfashionable post-nerf railgun plasma rifle version.  I'm also not a fan of that look but it has good conversion potential.

Because of the way the current plastic kit is laid out, the middle model is out as an inspiration.  A popular and useful conversion now is to do something similar to the right and magnetize the railgun tip so that you can swap on the missiles for the other loadout.


I like the options this affords and for a while (long before this codex came out) this was my top choice...until I found this!


As you can see, it's similar in style to my previous squad entry on the left.  I plan to make a few changes to both weapons and other parts (like adding hands!) but the overall bazooka look is what I'll go for.  I've got some ideas about switching the railgun bazooka over to the other shoulder and having the second hand come over to stabilize it but I'll have to wait until I get a model to see if the idea is truly viable.  Luckily, I have some extra broadside railgun bits including arms that I picked up for my riptide (namely the shoulder pad) that may expand the options.

Wednesday, June 3, 2015

Farsight and Friends

I now have a legal Farsight ally force painted up!  I decided not to go too crazy with the decals (at the cost of about a half dozen or so that I applied and then took off) and just used the FOW decals as the colored ones made the model too busy.  I went with the white stars on the shoulder, chest, and back (in descending size order) as well as a few spots of text including some pilot nicknames on the forearms of each suit.  Additionally, I put a flag on the left shoulder to go with the theme.  I tried out designation numbers on the left chest for all as well as the white stars on a red bar for Farsight but they just seemed out of place.  Without further talk about stickers on my soldiers, here's the pic:


The next step for the force is to add in another (big) fig that I got in trade a little while back... a Y'Vahra!  


My plan is to convert it to be usable as both a Y'vahra as well as a normal riptide for when opponents aren't keen on using forgeworld rules (especially trial ones like the Y'Vahra currently has).  I'll have to make another left arm as I plan on using the right one for the normal riptide ion accelerator.,  I'll also probably try to convert the head into something a bit more proportional to the model.  The FW variant doesn't have as bad of a tiny head issue as the normal riptide but it still looks off IMO.  I'll hopefully start construction of the models today so might have an update on the next addition sometime late this week.

Saturday, May 30, 2015

Farsight Enclave, ready for duty?... Almost!

It took me a while to get the first layer of paint on but slow and steady work over the last two weeks has finally gotten my first hobby project of 2015 (yeah, I know...I'm really late!) close to completion.  Here is my Commander Farsight conversion along with a full squad of crisis suits to keep him company (as well as make a legal 40k Ally force).  You may notice that the squad commander with the twin shoulder/jet pack weapons lost her swords since the last post.  Unfortunately, they were too fragile and pieces broke off twice while painting.  Despite partially pinning them (only partially due to some small pommel sizes), parts were knocked off both while holding the mini for painting as well as when the model fell over after a painting table bump.  Mechanically, I can still use the same in game upgrade I planned but I will miss the visual flair the twin swords provided.  I went with the traditional US WW2 green khaki color along with some gunmetal and brass trim.  For the shoulder and leg color accents, I tried to evoke a bit of the D-Day landing stripes you see on WW2 aircraft to break up all that green. 


I just finished the bases prior to posting this so the models are currently drying.  The next step would be a quick gloss coat and then the decal work begins.  I'm frankly not sure how far to go with the decals.  I'm definitely adding the US white star decals and a US flag from the Flames of War decals below to match both the theme and my existing related Tau army but I'm waffling as to how much more to add.


I'm considering adding the red and white triple stars to the Commander Farsight model to show his "general" rank status but I'm not sure about the rest.  The same FOW decal pack has alot of nose art style names that I'd like to customize each suit with.  For instance, they have a "Blood n' Guts" decal that I could put on my commander ala Patton.  I'm not sure where to put that though (the forearms like a tatoo, the "butt" as that side is pretty sparse on detail, the top of the jet packs, etc).  The side chest is obscured too much to make it worth it frequently and the head is too small so those two options are out.  I also have another decal pack that has a ton of warning markers on it that I'm thinking about using.


Placing the radioactive marker on the powerplant between the jet pack thrusters is one idea as are putting the danger and warning symbols on the jet packs and weapons (along with the rescue possibly on the chest).  These decals are not precut so they're quite fiddly to work with and very easy to screw up which is one thing going against them.  The other thing is that I'm worried about making the model appear too busy like it belongs in NASCAR.  Any thoughts on the subject would be appreciated.  Probably tomorrow I'll start on the decals that I absolutely know I'll use and where so I should have another update on these models later in the week.  As always, thanks for reading!

Friday, April 17, 2015

Modelling like it's 1989!

I went to a swap meet a few weeks back at a local store and traded for a Tau lot that included some Forgeworld 40k Tau Broadsides.  When checking out the parts for the first time this week (beyond just making sure they were all there before), I did a quick test fit of the shoulder pads of one of the broadsides on my Tau crisis suit models.  I do rather like the results.  The bare shoulders were in a way a necessity for two reasons previously as I didn't have enough after doubling up for my Farsight model and I also needed a way to distinguish the various ranks visually.  Unfortunately I only have a single pair of shoulder pads (the second broadside was missing them) but I did some mspaint magic to show how doubled pairs would look below:


I do rather like how they look with them on.  It seems like the shoulders blend visually with the thigh armor as well as give it a bit more of a samurai anime look as well.  I've contacted Forgeworld to see if I could buy extra but assuming that won't be the case (I've never heard of them selling bits) I've gone in the meantime with one pad each on the left shoulder as with the original model.  I had to sculpt a tau symbol to place on the 2nd flat shoulder pad.  Now, the normal suits will have the smaller pad, the squad commander will have the larger pad, and the army commander will have the pair of larger pads.  I hope to take some pics tomorrow of the modifications as I'm currently waiting for my first attempt at modelling with milliput to set.

I also did some more research that confirmed my suspicions about USMC paint schemes.  It seems like the only variation was on the company level applied in the field and that the tanks left the factories in the same olive drab color as US Army vehicles.  I really don't see myself applying a camo pattern to these suits as I already have on in my normal Tau army to distinguish the "scouts" (the pathfinders and their various derivatives with markerlights).  I leaning at this point to just continuing my existing paint scheme but the original Farsight Red (with Russian decals) is still an option as is a weathered winter camo look.

Thanks for reading and that ends the update about big shoulder pads!  :)

edit:  I figured I'd just update yesterday's post instead of making another very related one.  Here is a lower down shot of the completed models.  I used Milliput to make a second tau symbol for the bare shoulder pad and I filled in the empty lip on the other shoulder pad with milliput.  I also used some liquid greed stuff to plug the casting holes in the finecast.

 The home made tau symbol had some imperfections in the edge so the green smudge you see on the edge is my attempt to rebuild it after casting it.  It looks like I won't be getting additional shoulder pads for purchase so this is the final loadout and they're pretty much ready for priming at this point.

I found last night an example of a Tau army done up in the weathered winter style pattern I mentioned using above (but without the soviet decals of course).  I'm really glad I found it because I never would have thought that it would look in practice so different from what I thought it would in theory.  The painter did a really good job completing the scheme but I in the end think that grizzled look is where I'd want to take my Tau now that I've actually seen it done by someone who likely did a better job than I'd have been capable of (especially on a first try).

I've decided to go with the US WW2 style mentioned earlier but I plan to embellish these models with more decals as well as USMC markings instead of the US army cavalry ones the main force has.  Things like cockpit markings, danger and radiation warnings, flags, etc.   I plan on making the suits a mix of tank and airplane style decals with the olive drab base color and some edge highlighting.

Saturday, April 11, 2015

Assembly completed! Now onto painting...

I finished up the assembling the rest of the crisis suits for the Farsight Ally force this past week.  I started by tweaking the weapon loadout of the last model I built.  In my older Tau force, all the crisis suits are modeled with plasma rifles and missile launchers.  The combo was an effective take all comers loadout with the previous codex's rules and visually evoked the Heavy Gear robot style as well that I'm a fan of.  With the current rules (both codex and game rules), it's much better to specialize against a particular target.  I do like the double gun(slinger) look as well so visually I'm ok with the change and if I ever do field the squad then they'll now be able to take on heavily armored infantry a bit better.  Here is the redone loadout standard crisis suit from above along with the new one that I assembled this week.  For the final model I decided to use the standard pose for the torso and legs but gave him a bit more of an active pose above the waist to contrast with the relaxed look of last week's model.


And here is the whole ally force made up of Commander Enforcer suits.  I think there is enough variability in the poses to make the squad look dynamic enough and not just carbon copies of each other.  I'd struggle to find a way to add another model from the same core model without copying one of the other poses though.  Game rules-wise, this ally force consists of Commander Farsight and a troops Crisis suit squad with one upgraded to a shas'vre with the fusion blades signature system.


The next step is thinking about how to paint them.  This will be my third successive project on the blog that, if not continued, would add to my hobby pile of (unpainted) shame so I'm definitely completing something before moving onto anything new.  Since I've been having fun modelling the Tau, I'll probably continue working on them as well.  My original Tau force is painted up in a WW2 US army green scheme with the corresponding white star decals.  I'm not sure if I should continue it with these models or come up with something new but related.   The standard Farsight color scheme is a deep red with some grey trim. 


If I went with that, I'd go with a "russian" decal style with red stars instead of the white to signify the "ally" status and the more martial stance of the Farsight enclaves as well as the "communists in space" stereotype that the tau in general evoke at first glance.   Alternately, I could continue the motif a bit further by doing a WW2 Russian brown base color instead.  Alternately, I could research a USMC scheme to contrast my US Army one for my main Tau force.  I admit that I'm fairly ignorant about WW2 USMC schemes beyond watching some John Wayne movies as a kid and vaguely remembering a patchy camo.  Over the weekend, I'll try and look up a few more options but feel free to comment if you have any ideas in the meantime. 

Thursday, March 26, 2015

Tau Commanders Tweaked

After noticing that my eyes somewhat awkwardly were drawn to the Captain Morgan prominent hip and crotch pose of my Commander Farsight conversion, I decided to tweak the pose a bit to decrease the hip joint angle there.  I also decided to take the middle ground in relation to the ribbons and instead added the bonding knife to the hip with the ribbons pointing into the front view instead of adding all the cloth bits.


For the second model in the small ally force, I decided to try and model the special character Commander Brightsword as a younger subcommander shas'vre model leading a crisis squad.  I did a couple of blue tac mock ups of this model with various arm poses and even different weapons (swords in the hands vs blades under the forearms for example) and decided to go with the following.


The in game loadout for this model will be a shas'vre upgrade to enable access to the fusion blades signature system along with the prerequisite twin linked fusion guns.  I used some long barrelled fusion guns from a turret I converted to a aegis defense line gun to give it a bit more menacing look as well as reposed the legs to give it a leaning forward running pose as well.  I plan on finishing this project with two additional crisis suits with a fireknife pattern (plasma rifle and missle pod) to fill out the mandatory squad.   Here is a group pic of the two built commanders:


Monday, March 16, 2015

Converting Models For the Greater Good!

Sorry about the delay in posting but frankly I haven't had too much to update until this weekend.  My hobby funk has for the most part continued as I did a few more base colors on my Ferrus Manus conversion but no part of him other than the cloak are finished.  I'm having a hard time finishing up the models (painting) but I did get up enough enthusiasm up after checking out some of my favorite hobby blogs and youtube channels for inspiration to build/convert another model.

I picked up in a trade some Warhammer 40,000 Tau Crisis commander suits that I'd been wanting for two years since they came out.  I really like the extended look of the models compared with the squat almost chibi look of the previous plastics.  The forgeworld variants that came out a decade ago are a marked improvement over the plastics but the sculpt on the "new" commander is definitely my favorite.  I decided to convert one into a Commander Farsight model as I'm not a fan of the official one.  The cloven hooves strangely bother me (but the weird toes don't!) and the pose and ribbons seem at odds on the model.  


This was only my third ever finecast model worked on and they've definitely improved on the QA and casting quality in the years since they introduced it.  Unfortunately, the bar was set so incredibly low that even marked improvement still puts the finecast material in the substandard category IMO compared with other companies' resin offerings.  While the giant detail obliterating bubbles are largely gone (at least from the last two models I worked on), there are still alot of uneven surfaced that should have been straight and which require careful trimming next to easy to lose details.  Some pieces didn't fit right so had to be warmed and straightened.  Each piece had double the number of LARGE vents compared with resin both from GW's subsidiary Forgeworld as well as Dream Pod 9's Heavy Gear line.  Both torso corners had bubbles on my model (one on the crisp corner and another enlarging the notch seen above on the right chest) as well as more on the top of the model.  I lucked out in that the biggest flaws on the chest that would have been the most difficult to fix were actually obscured from view by the arm poses described below.  I'd rate finecast right now at about a C+ grade compared with the previous F that it deserved as it is still markedly more troublesome to prep, fix, and clean that comparable materials and offerings.  It's a bit sad because I think the sculptor knocked it out of the park with this particular model.

Getting back to the actual model, the key defining feature of Commander Farsight in the tau army and model range is his focus on close combat.  I decided to use a spare sword from a 40k Eldar Wraithlord kit to arm my conversion model. I've seen a bunch of folks use the rather large sword for the conversion for years but I've only ever seen one model that was built using it as a large two handed sword instead of in a single hand.  It took some creative clipping of the elbows and posing but the sword and the troublesome limbs finally lined up in the correct shape.  The original model has a leaning back pose which didn't fit with the whole samurai robot motif so I decided to give him a bit more leaning forward and aggressive pose.  In order to properly position the leg, I needed something to prop up the foot adecided to use a spare rock rubble piece left over from Ferrus Manus.  After incorporating that on the 40mm base, I actually came up with the idea of using the rest of the leftovers from my primarch to surround Farsight with marine casualites.  I plan to magnetize the scenic display base to snap "over" the game legal 40mm one.


He's armed with the large alien tech sword, a shoulder mounted plasma rifle, and the shield generator fixed to his back powerplant.  Here's a pic of his next to some other Tau and 40k models for a size comparison:


You can see that the newest crisis variant is less "squished down" than the others (the original plastic suit on the left along with a Forgeworld variant character on the right).  I like that it finally looks like the Tau infantry figure can actually fit in the chest of the crisis suit in something other than a 3rd trimester fetal position!  Of course, I'm a bit of a nut for proper scaling in 40k as this blog shows so you'll have to excuse my bias.  Let me know what you guys and gals think and what can be improved.  I'm debating whether or not to put a loincloth and some cloth draping on the model to honor the original "ribbons" festooning the official model but I'm frankly not a fan of the idea.  My marines are already festooned with stuff like that and I rather enjoy the more clean and practical look of the Tau.. or at least as practical as you can get with a flying giant anime robot armed with a big sword.  :)