Showing posts with label RAFM. Show all posts

Thursday, October 15, 2020

Only Digital Bytes to Show...

 for my hobby efforts this past month!  I've been out of resin and running low on alcohol to clean the printed models so I haven't actually printed anything in a while.  I've kept busy though tweaking/converting 3d models for potential future printing though from scifi RPG character models to Star Trek spaceships to Heavy Gear stompy robots.

I restarted tweaking my old HGA Heavy Gear Hunter model yet again.  I had problems with the two prints that I previously attempted and I tweaked the loadout on this version to be a basic Hunter instead.   I previously attempted a multipiece print for my second try but wasn't happy with the results.  After some encouragement from Ashley over at the Paint it Pink blog (link), I decided to try it again and was eventually able to both split the parts and set up a ball and socket connection system between the parts.  

One of the flawed gems of the last console/pc generation was IMO the first Force Unleashed game (the followup was admittedly a rushed cashgrab abomination!).  I really liked the look of the Sith Stalker variant of the character model and never saw an official model/miniature other than a single toy figure in a larger boxed set.  I recently found a decent 3d model likely ripped from the pc game so it definitely needed conversion to a printable tabletop gaming 3d model.  I thickened up various bits to make them sturdier/more likely to print successfully as well as changed the pose as much as I could without any actual knowledge of video game animation.


And finally we have a selection of Star Trek ships that have been converted into something that more resembles a different era.  First up we have a DISCO ship that I've converted into an NX era ship.  The second is another DISCO ship that I've tried to convert into a TMP era Akira class.


Thursday, August 23, 2018

Summer Hobby Update

It's been a while since I did a full hobby update but I finally have enough to report in.  Over on the tabletop hobby side, I've got a few pots slow cooking on the stove at the moment.  The release of Kill Team for 40k got me a bit excited about the tabletop game universe again.  It's a skirmish level ruleset that you can simply plug and play your existing 40k army figures into.  I've started to parcel out a dozen or two figs from each of my main 40k armies into a separate carrying case to use with Kill Team (and also double as RPG figs as well potentially).   Additionally, I've started to collect some more bits and figures to build a few more of my Winged Hussars custom chapter.  My goal is to have a combat squad of five primaris marines for Kill Team as well as an RPG character model.  While the overall look will remain the same for the Winged Hussars, I will be testing out a few variant bits like shoulder pads and tabards to fine tune the look with the next few figs.


At a recent game store swap meet, I also managed to trade for a two dozen figures (mainly 40k Kill Team figs) that included a few Rafm HG minis.  The big draw for me was a broken mostly complete (no head antenna) Kodiak gear.  I still haven't painted any of my previous HG Rafm conversions from last year but I just couldn't resist getting the original version of the Kodiak to complement the Destroyer Kodiak I built last time.


A while back, I mentioned that I was joining a Starfinder RPG campaign but that fizzled out after two games.  We didn't have a dedicated GM and no one else was interested so I volunteered on a strictly temporary basis.  Unfortunately, the "space fantasy" feel of Starfinder's setting and mechanics wasn't for me.  I wanted a full scifi rpg and it instead felt more like D&D in space.   My offer to transition the group to Star Trek Adventures were unsuccessful as the non-traditional nature of the setting (i.e. not-a-murder-hobo simulator) wasn't as popular as I'd have hoped.

The Wrath and Glory Warhammer 40,000 RPG is coming out soon and I picked up the free introductory adventure.  I'm a bit concerned about the depth of the rules/options in the core book due to the ambitious breadth they're attempting to include.  I can't help but feel the ruleset would have been better served by focusing strictly on Imperial campaigns instead of also adding in barebones chaos and xenos options but I'm leaving final judgement to after actually trying out a session as GM.

Tuesday, March 7, 2017

Malibu Jaguars... with new hat!

Yes, I opened up a blog post with a classic Simpsons reference as it seemed appropriate.  Recently, I sold some Heavy Gear Rafm minis to Ashley over at the Paint it Pink blog and she was kind enough to include a Fire Jaguar head in with the lot so that I'd have matching hats/heads for my Jaguar squad.  When I was assembling my RAFM gears last year, I found out that I had a mispack or missing parts rate of one in three sealed blisters.  As a result of that terrible QA back in the 1990's, my Jaguars all had mismatched heads unfortunately (along with a mispacked Hunter backpack as well).  I did the best that I could in trying to get a cohesive look for the small squad of three gears and ended up press moulding a Fire Jaguar head to match the two that I had.


It's far from the prettiest looking Jaguar head with the extra VR-style visor over the typical optics but I thought it conveyed the advanced targeting on the Jaguar somewhat compared with the typical heads on my Grizzlies and Cheetahs.  I had been on the lookout for a third matching head and Ashley came to the rescue recently!


I added a bit of paperclip to represent an antenna as the model is a "thunder" command variant with the satellite uplink modelled around back on the V-engine.  I don't know when or even if I'll paint these up but Ashley's blog is scratching the RAFM painting itch with frequent updates.  With this squad now officially done and her doing updates as well, I'm a bit motivated to try and do the final Hunter squad for this force.  Initially, I stopped as I noticed a few more Hunter mispacks on top of the issues I was having with the Jaguars but I'll have to re-evaluate the situation with them this upcoming weekend.

Saturday, January 14, 2017

State of the Blog Address for 2016

Last year, I did a two part post reviewing 2015's hobby progress and I've decided to do the same this year.  The good news, for folks who found the previous one too lengthy, is that this one should be shorter since I've accomplished less!  I'm not sure if that comment deserves a :)  or :( though.  Additionally, I'll be trying out some new embedded image formats in this post so let me know if they're presenting a problem for legible reading as I'm having some difficulty in formating them here on blogspot. 

Unfortunately, my previous three big completed hobby projects (Heavy Gear, Robotech, and Halo Fleet Battles) failed to garner me any games despite having 2 player painted forces to use to lure (absent) curious folks into a battle.  In the meantime, I've mostly lost interest in the old standby games of 40k and X-wing and my local (25 miles/40km away) store even closed down early last year.  None of the above really had a positive effect on my motivation to buy, build, paint, or play frankly but I did find a few things to keep me interested in the meantime.

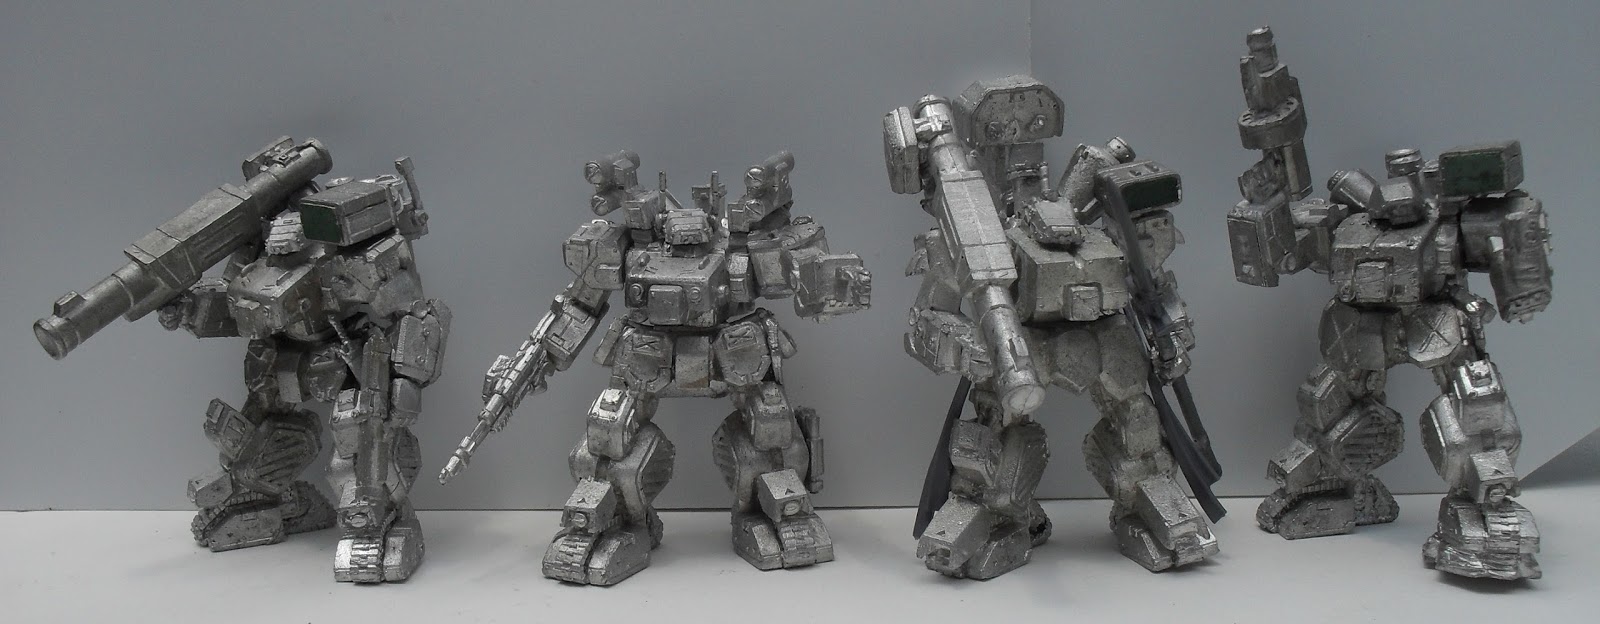
The first project that I picked up on a whim was to build an old RAFM Heavy Gear force up.  These were the figs that first got me into painting independently (although I was a part of a Star Trek FASA group prior to that in which I used other players' figs) and I couldn't pass up the chance to put a few of them together.  I mostly went with a one of a kind style force building with no repeated variants for my northern force.  I'm really happy with how the Grizzlies and Cheetahs turned out but not so much on the Jaguars mainly because of the Arrow Jaguar whose head I had to scratch build/mould with my meagre skills.  I'm also still undecided whether I'll crack open the blisters and build a southern force to potentially face them.   I could theoretically use them with the current nuBlitz rules as I modelled/converted them to be legal for use with them but I've already got multiple painted demo armies in my foam case in the current scale and am even expanding the ones I carry with me a bit (see below for details).


On a similar nostalgic note, I started last year by catching up and rewatching old episodes of pretty much most of the Star Trek series, both my old favorites as well as ones that I missed in both first run and reruns.  This in turn rekindled my original hobby experience and I started designing stat sheets for fan ships for use in the old FASA game.  Most of the designs come from the mind of Bill Krause so I'm very thankful that he let me use his images and ships for my sheets.  He's got a few more designs on the way and I've got a few others I'd like to cover so you'll all be likely seeing more of those in 2017.  Additionally, I worked on some Star Trek Attack Wing house rules that aren't still ready to publish but I do hope to post a review of some Star Trek deckplans hopefully tomorrow.


My only played game though was in the final days of the year with a quick post-Christmas session of Munchkin (Adventure Time edition) that I bought for some younger cousins who were fans of the show.  I'd unsuccessfully tried to get them into card games (although one has since picked up a Pokemon habit in college), miniatures games (with Heroscape), and comics.  Munckin has caught on though with one cousin and his friends and I look forward to passing on my original Munchkin collection to him so it can see some use.  When he turns 21 and starts playing with some friends who have already had a few drinks, the true backstabbing should begin.  :)

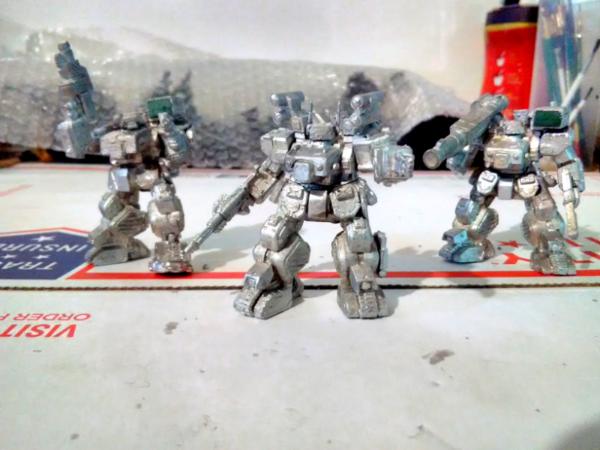
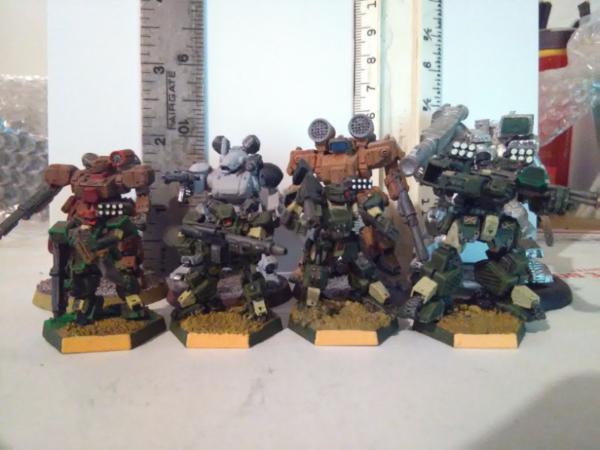
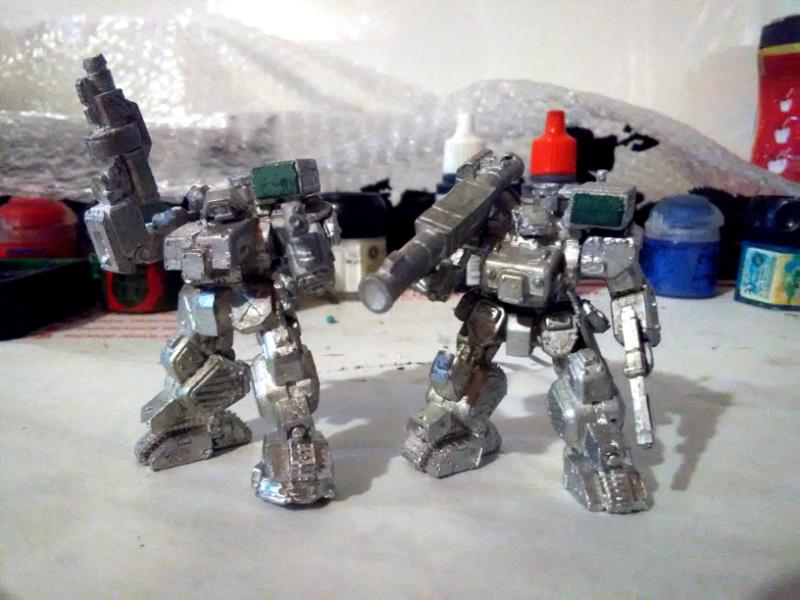
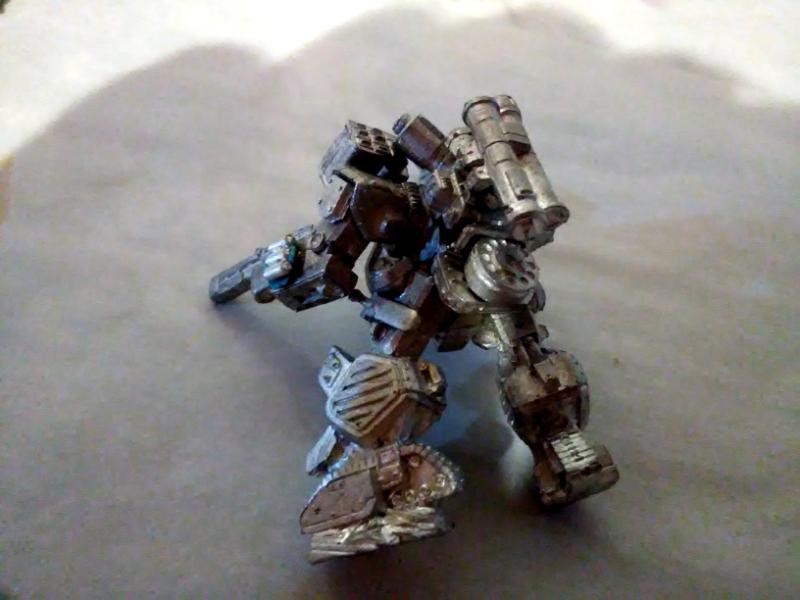
Since my previous hobby efforts with Rafm Heavy Gear only involved assembly and conversion and not painting, I decided early this year to dip my toes back into that hobby pool as well.  And by dip my toes I mean exactly that... just some minor weapon conversions on existing painted pics.  After a year of disuse, my inventory on supplies revealed alot of dried up paint pots and glue tubes so my options were as practically limited as they were theoretically by my willpower.  I left off in my previous current scale metal HG project at converting my Northern commander into a legal model as his previous variant/loadout didn't carry over to nuBlitz.  Additionally, my Tau side project had a special character commander model conversion (that I use as my profile pic here) that I wished to be able to use as a WYSIWIG competent normal commander as well so I decided to add another plasma gun to fit the theme of his squad.  These were some very minor projects that hopefully will yield more in 2017.  Ideally, I'd like to finish up the remaining primed, basecoated, and washed broadside suit for that same small ally Tau force.

Finally, I'd end of on a positive note in that I found out about a month ago that another store roughly the same distance from me opened up not far from the location of the previous one.  While I haven't made the trek up there yet, I hope to do so in the next few weeks.  While I suspect the player population is largely the same, I hope that my own personal prospects for getting a few games in will vary from my previous attempts in 2015.  In preparation for this (and after checking the Spartan Games forum), I've taken out my Halo minis from my case and replaced them with a selection of X-wing ones instead.  In all honesty, Halo Fleet Battles has no worse prospects locally than either Robotech or Heavy Gear but I have alot more nostalgia for those minis games so they'll stay whereas I'm primarily nostalgic for Halo in video games.  I've added additionally the above Northern HG commander and some more Nucoal forces into the empty slots as well.


Saturday, June 25, 2016

RAFM Army so far...


A group shot of my force as of today.  I somewhat successfully cast a lower detail head for the third jaguar and magnetized it and a normal head for easy swapping as needed.  While it isn't as sharp as the original metals, it's better than the picture indicates.  I have to stop thinking of the groups as squads as I've been referring to them since they're not actually legal squads.  From the 10 models, I can field two legal squads out of the three strike, dragoon, and fire support options.  My next trio was intended to be Hunter variants but I think I'll hold off until the new rules come out hopefully next week.  Three of the four hunter variants I can build don't actually exist in the current rules and would require significant conversion and/or substitution.  I'm hoping some more options open up with the 2016 revision.  Alternatively, I could start working on some infantry in the meantime or even start my southern force.

Thursday, June 23, 2016

Recon gears assembled

Here's the currently complete recon group.  I built the third cheetah as a White Cat with two small conversions: the rocket pack and the EW forearm bit.


I might change the rocket pod back to the vertical one if I decide to build another stock Cheetah (my only planned repeat!) as I only have one left.  My group photos turned out really badly due to the lighting so I'll have to wait until the weekend to try again in better and hopefully natural light.  I also had another idea about the Jaguar heads and decided to try casting the fire jaguar head instead of the more modern one that I initially tried.  I'll post an update about that tomorrow along with some group shots and further ideas this weekend.

Wednesday, June 22, 2016

Cheetahs on the prowl (and Strike Squad Redux)


I did a partial repositioning of the Arrow Jaguar's head and missile launchers.  Initially, I wanted the model's front view to look as similar to the old RPG art as possible but unfortunately the pose overall suffered IMO.  I took off the head and missile launchers, scraped clean the superglue, and repositioned them to look a little more like I initially intended.  I imagine the advanced tracking systems on the Jaguar have the missile mount on that side turn to where his sensor cluster (the head) is pointing so I turned the one mount and left the other facing straight forward (but still at the RPG tilted angle from the vertical.

Next up, I worked on some cheetahs.  These guys were less time intensive as I didn't thankfully have to (so far!) worry about mispacks and the conversions were relatively minimal.  I clipped and repositioned the normal cheetahs arm to infront of him and added a Blitz scale dagger to liven up the pose a bit more.  As usual, I swapped out the curved rocket pack for an angular one.   Additionally, the pic showed me that I missed some spots when stripping and reposing this model so I'll have to go back and do some concentrated scrubbing tonight.


The second model from the recon squad was the strike cheetah.  Whereas the normal cheetah is a mix of Electronic Warfare and defensive capability, the strike cheetah focuses more on the latter and adds some offensive punch.  Initially, it was an aidrop capable unit but strangely it has been split up into three separate bazooka cheetahs, only one of which is airdrop capable.  Either way, here is my Metal Cat/Strike Cheetah/Para Strike Cheetah/Silver.  The changes to the stock model were adding a pack gun to the left hand, swapping out the Rapid Fire Bazooka for a Light bazooka, and the rocket launcher swap.


Next up will be the White Cat Cheetah variant and some group photos!

Tuesday, June 21, 2016

Strike Squad done... sort of...


I tried various possible solutions over the weekend to my issue of the mismatched Jaguar heads this weekend.  Raiding the various bits boxes didn't help and several different attempts at press moulding just ended up with the following mostly low detail and frequently unusable bits.


The two best cast pieces still had detail issues on the bottom half (although the less detailed top turned out fine) so I decided to cut off the bottom and try to convert existing blitz scale heads into the bottom portions.  Unfortunately, it just looked like the blitz heads were wearing a small hat instead of a cohesive single head.  In the end, I settled and used the two Fire Jaguar heads as the normal heads and the Thunder Arrow variant used the mispacked hunter head. 


I'm not entirely happy with the pose on the missile launcher commander model.  I was going for a "follow me, men!" type raised arm but instead it looks a bit more like a Papal wave unfortunately.  I had planned on turning the torso more but then the head wouldn't be oriented in the same direction due to the missile launchers.  I may revisit this pose in another few days after I finish the next squad.  I also converted the MAC to a bulkier version using some 40k and Robotech bits.  The MAC is one of the worst offenders in the underscaled weapon department for Rafm era models with the supposedly bigger weapon coming in smaller in volume than the LAC and even the pack gun.  Here's a side/back view of the three.


Next up will be the three gear Recon squad of cheetahs.

Saturday, June 18, 2016

Forming a Strike Squad


I decided to follow the template set up by the Fire Support squad in making each model in the squad a unique variant.  The models that I had to choose from were two Fire Jaguars, a Jaguar Predator, and a stock Jaguar.  The Predator was out as it has no equivalent in the current living rulebook (LRB) so I decided to turn it into a bazooka armed Destroyer variant instead.  The stock Jaguar, while supported, was too similar in loadout for my tastes as the two Fire Jaguars (all three wielding MACs) so I decided to try and convert it to a Flash Jaguar instead.  For the Flash variant, I thought it might be nice to convert the arms into a folden across the chest position as opposed to simple at its side.  I took some cutting, pinning, and filling but I'm happy with the final result.  Finally, I decided to try and convert one of the two rocket based Fire Jaguars (the unassembled NIB model) into a missile firing Arrow Jaguar instead to stand alongside the assembled Fire Jaguar.  Picture below are the Destroyer and Flash variants.


Unfortunately, when I opened the three blisters I had (one Fire Jaguar was already assembled and painted), I noticed that every single Jaguar head was different.  One had the extended visor just as the assembled Fire Jaguar, one was angular similar to modern Jaguars, and one was oddly curvy but not very similar to the cury Fire Jaguar heads either.  Unfortunately, the engine in that pack also didn't match and it appeared that I had yet another RAFM mispack.  From looking at various pics online, I had a hunter "bits" plastic bag in my Jaguar blister instead of the correct one.  You can see the various heads in the pic above as well as the engines below.


I decided to only build three Jaguars (similar to the three Grizzlies... not including the Kodiak commander) since I only had three correct matching engines.  The heads, however, were a different story as I'm still not sure what to do.  On a lark, I figured I'd try to email Rafm and see if they had any extra bits left over from that era.  I realize it's a very long shot and hopefully they'll be able to help.  If they can't my only options will be to either use wildly different heads or try to press mould additional heads.  For now, I'll hold off on the decision about the heads and next build the last Arrow Jaguar addition to the squad.

Tuesday, June 14, 2016

What squad and which variants next?

Just a quick update today.  I mostly took the weekend off but tonight I swapped out the Kodiak rocket launcher for the larger one the grizzlies have for consistency. I've also been considering what squad to build next. My general choices given the models I have on hand are general purpose, recon, and strike squads. Personally, I'm leaning towards the strike squad of Jaguars and to a lesser extent the recon squad of Cheetahs.

With the Fire Support grizzlies, the blisters were all different with vastly differing bits that couldn't be replicated easily... but that isn't necessarily the case with either the recon cheetahs or the strike squad jaguars. For both squads, I can build either four different models as I did with Fire Support squad or build a bit more optimized two pairs of two variants with some minor conversion. For instance, I have two normal cheetahs (one built), a cheetah fang and similar strike cheetah, and a white cat and similar white cat EMH. Any thoughts? I'm leaning a tiny bit towards different loadouts for the squads mainly for visual variety as opposed to a cohesive looking or mathhammered efficient force.  Any thoughts?

Finally, I'm debating how to base the models.  Initially I had planned on buying some packs of 40-50mm lipped circular bases but then realized I still had dozens of 40mm bases from Robotech that I'll probably never end up using.  The kodiak overhangs a little bit but even the fire support gears fit well enough on them.  

Saturday, June 11, 2016

Kodiak Destroyer Conversion

Here's the final grizzly family member in RAFM scale.. my Kodiak Destroyer um... chaplain... or duelist... or army commander... not sure which (or what combo of those) yet! 


I changed up the rocket pod just like with my previous gears (although using a smaller bit to signify the lack of dual pods in the current rules).  Due to the relative size of the protrusions like the engine cylinders and the bazooka, I frankly didn't have much posing options.  The arms pretty much could only be elevated as much as they arm due to bumping up against the engine and the torso couldn't really be swiveled much either.  In the end, I decided to go with a more on purpose looking static pose trying to make lemonade out of lemons.  I took off the pack gun from the left arm  (as well as the circular rocket pod) and drilled out the hand.  I converted my last 40k grey knight halberd into a duelist weapon/melee staff similar to the one used by the gearstrider Scimitar.  I then added a few cloth bits (also from 40k) to make the character model a bit more similar to the cover art of the original northern Blitz book (and the art on the current Northern chapter page in the living rulebook).  I considered adding back a folded pack gun like I did to the Crossbow grizzly but ultimately decided against it (as well as the APGL) as I thought the model would look too busy. 

Here's a group shot of all four together.


I was relatively surprised by the similarity in size (minus the missile launcher) of the Kodiak to the other grizzly models.  This matches the RPG fluff on which these old models were based but I suppose I just got used to the injected size differences between classes in current blitz.  I had hoped to use the Kodiak as a Gear Strider in current scale Blitz but it's a bit smaller than I had hoped.  The Scimitar (according to the original DP9 press release) is 68mm tall but they didn't state to which part of the model (it has a humpback tower/turret behind and above the head).  I assume that it is to the literal top of the model; in the case of the Kodiak, it's about 62mm to the top of the missile launcher and about 52mm to the top of the head.  I'll have to actually see (and hopefully compare) it to a real Scimitar both in height and bulk to see if it's a worthwhile substitute.  It's not too much of a problem in the current living rules as the LOS by default is substituted by a rectangular profile regardless of the actual model dimensions. 

Finally, I can deny it no longer... my new cell phone camera sucks at taking model pictures.  Part of the issue is the time and location of the pics (in the evening when I can work on the models and in the not so bright basement where I do the hobby work) but the camera app doesn't have great features as well (like no dedicated macro function).  I tried retaking some pics last night with my old dedicated digital camera (a simple consumer model.. nothing fancy) and it was a little better but still not much.  Today, in between clouds, I tried taking some natural lighting pics and will be replacing the previous blog entries with the better pics where possible.  Without further whining about my lack of photography prowess, here are the new better but still not great duo pics!


Thursday, June 9, 2016

RAFM Grizzly Three Amigos


The third grizzly fire support gear is built!  I decided to upgrade the third grizzly from a standard crossbow variant to a thunder command gear as well.  The change ruleswise just adds some comm boosts and a satellite uplink and must be used as the squad commander.  Modelwise, I made a few more changes in line with the old RPG art.

The assault/destroyer grizzly (bazooka guy) was supposed to have a moderately upgraded comm signified by a single bunny ear on the head in the dog.   In the current rules, the destroyer gets no such buff so I left the bunny ear off.  The thunder variant though has a full set of ears which worked out well since I now had access to two bits.  Additionally, I added a sat uplink cone to center of the backpack from my smaller scale blitz bits box.  It's technically supposed to be off to one side but that wasn't a particularly sturdy conversion so I glued it centrally instead.  Finally, the "pointy" arm looked a bit more commander-ish so I swapped it out from the Destroyer variant where I suppose it was supposed to be a sort of arm stretched out counter balance to swinging the bazooka around.


And by special request, here is a size comparison between similar Rafm and current metal Blitz scale models.  From L to R:  cheetah scout, jager/hunter trooper, jaguar elite, and grizzly fire support gears.  I don't own any gearstriders though nor any normal striders unfortunately.  


I haven't assembled my Kodiak yet but he is the next gear I tentatively had planned on building next.  I dry fitted some pieces though and I was surprised to see that, while bulkier, he isn't much bigger than standard grizzlies unlike in blitz scale.  I had been hoping to use him as the northern Scimitar gear strider (and the RAFM King Cobra similarly for the Drake) but there is a chance he might be too small!  When I finish the Kodiak, I'll try and do another comparison.


Wednesday, June 8, 2016

I think I spilled some JRPG on my models...

I worked on the second grizzly and took a few pics.  Here's the previously mentioned Destroyer Grizzly variant built and converted:


The general basis for the fig is the RAFM assault grizzly but I've upgunned the bazooka to a heavy version as well as changed the other weapons to match the current rules.  The arm is the same but the original medium bazooka had to be clipped/filed off and the new one glued on.  The end result is a bit comically huge like a JRPG weapon which I wasn't expecting but the other one was a tad too small as well (especially since it'll be the weapon on a bunch of smaller trooper gears as well).  With the larger weapon size, the position of the engine cylinders actually became an issue for posing and the one I chose is basically the most level right arm pose I could get.  The waist was angled down initially and when I put the torso on the gear always looked like he was looking for a dropped coin or his keys on the ground... so I extended the waist a bit in the front which angled the torso up just enough.  I drilled a hole in the hand and put in a pack gun and added the usual bits including the same rocket launcher.  The rockets aren't actually WYSIWIG but the new rules simplified grizzly rockets all to the same statline so shouldn't be an issue.  The original strike grizzly is supposed to have a smaller rocket on each shoulder and the destroyer probably has them on the back of the engine (they're strangely never shown in the rpg art).  I had some bits lined up for the heavy spike gun on the left forearm, a spare fragcannon, and extra head bunny ear antenna but decided to go with the modern loadouts instead.  Here's a group photo with the Rabid Grizzly...


Next up (probably tomorrow) will be the Crossbow Grizzly blister that I'll also convert into a Thunder command variant.  

Tuesday, June 7, 2016

RAFM Grizzlies spotted incoming!

So it took me a few days but I cracked open a few of the blisters.  As the grizzlies were some of my favorite, I decided to open those first and start on the core of a fire support squad.  I didn't notice it at first but my rabid grizzly was a strange mispack as it was both missing bits and included USED bits from another kit with 20 year old yellowed super glue on the bottom of the head!  I guess QA wasn't as tight as it is now back in the day (see more below).

I definitely remember the models as being prettier at least in the blister than they are in person 20 years later.  Besides just the missing/swapped used piece above, there are frequent mould lines and minor slips as well (especially on the rocket pods).  The sculpting while nice is very antiquated at times, especially on the rocket packs.  The packs look like someone just took a needle and kinda sorta poked holes in semi dry green stuff, eyeballing the angles, number, and orientation.. and that's probably what actually happened, lol!  Pegs on arms simply don't fit into the holes on the shoulders and flat joint surfaces are convex instead.  There's definitely alot more prep involved in the classic models than compared with modern (soon to be replaced) metal Blitz scale offerings. 

Initially, I had a hard time deciding which variants to actually build and exactly how to build them.  For instance, I have an assault grizzly pack with all the necessary bits to build a 1st edition RPG loadout assault grizzly.  I could do that but the variant no longer exists in the upcoming Blitz rules.  Instead, the only bazooka armed Grizzly in the new rules is the "destroyer" variant which was an upgrade of the assault grizzly with an even bigger bazooka.  No problem, right?  Except that the loadouts for everything but the bazooka have changed for the "destroyer" in the 20 years since.  The Hbzk is the same but the rocket packs changed location and type, the mortar magically reappeared, the heavy spike gun reverted down to just a simple knife, and the frag cannon (think mecha sized shotgun) turned into a pack gun (think mecha sized uzi).  Of course, the pack contains almost none of the above.  Looking through my 20 year old bits pile (some original rafm bits were still in my 40k ork bits pile!), I found some needed parts so that I wouldn't have to open another blister just yet and scrounged the rest from the other grizzly packs (assuming they were extra there).  I decided to go with the modern loadouts whenever possible.  Sometimes I was restricted by the actual physical size/position of the parts, other times they just weren't available, and in one case I just wanted to change the asthetics. 

I started with the Rabid Grizzly as I initially thought it was the variant with the least amount of changes necessary.


As you can see, I put some green stuff on the front of the ugly pin hole rocket pack; I'm going to try instead to just paint on the rocket pips.  I initially tried some quick impression sculpting (pushing some existing modern rocket packs into the still wet green stuff) but it didn't work well so I just flattened out the surface instead.  Also, in the original RPG art (and the Rafm models), the angular northern gears had curvy rocket pods whereas the curvy southern gears had angular pods.  I decided to reverse that to have the aesthetics match.  You can see the original hex base that came with the models as well as some optional bits that I'm considering using.  Even back in the original Rafm days, the gears spilled over the edges of their bases.  I think I'll instead base them on 40-50mm round bases (which actually would be legal in current blitz!).  I'm also considering adding the grenades and ammo cannister to the model as shown below (on the butt plate and forearms) but I'm not sure if it'll end up making the model too "busy".  Finally, the head is technically incorrect but it kind of matches the "extra armor" motiff of the variant (you can see the correct distinctive head when I post the destroyer variant).  I also added an extra armor plate over each shoulder joint to give it more of a tough look.


I'm a little torn on that as they'd cover up the distinctive butt plate design of the gears.  If I did it for one gear then I'd probably put extra ammo for each one in that weapon (and they do that occasionally with the current metal scuplts as well).  Particularly eagle eyed HG experts might notice that I cut off the butt plate from the engine (they're moulded as one piece) to give the model a bit more variety in posing.  I'm not as much of a fan of keeping everything in back all in exact alignment and apparently neither is the current staff at the company as they have had them moulded separately since.  Thanks again and let me know your thoughts if any on the addition of the bits issue.